Project: Trail'r
Pictures below
This is my new project. I'm going to convert this 1967 M416 military trailer into a 4-wheel'n trail'r. This page will track the progress of the conversion.
The requirements:
The plans:
7/10/98
I called Surplus City in Oroville, CA. Robert told me that he had three
M416 trailers for sale. I left for Oroville later in the afternoon (600 miles away).
After a quick stop to purchase a Pintle hitch for the Jeep in City of Industry I
was headed out of town. I arrived at Mike's house in Sacramento at about 1:00am.
7/11/98
I arrived at Surplus City in Oroville, CA at about 9:15 am. The first trailer I saw
was the one I ended up buying. The trailer was in remarkably good condition
considering it was 31 years old. The tires were 16x7.5 (32" tall) and had very
low miles on them. The tub was almost completely straight. The only thing
wrong was the seven 5-gallon gas can holders. Since I didn't need those they were
sure to be removed, leaving many holes to patch. The other two trailers were in very
poor shape and too much of a "project" to take on.
Pictures:
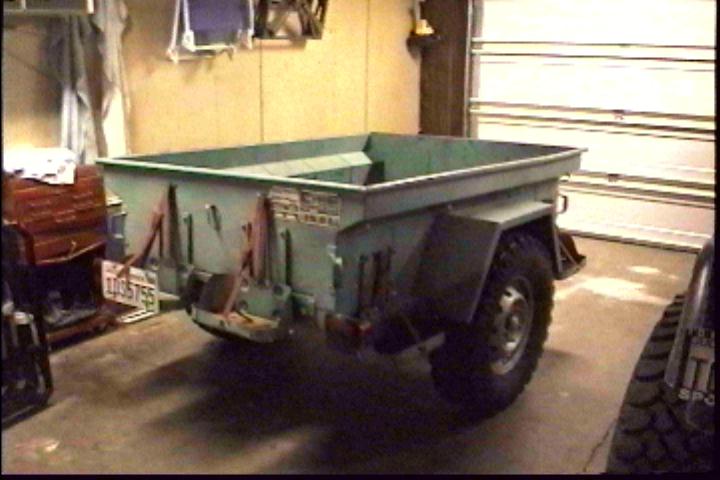
Pic 1 (The trailer the way
I purchased it, taken from the back)
Pic 2 (The trailer the way
I purchased it, taken from the front)
Pic 3 (The data plate
attached to the back of the trailer)
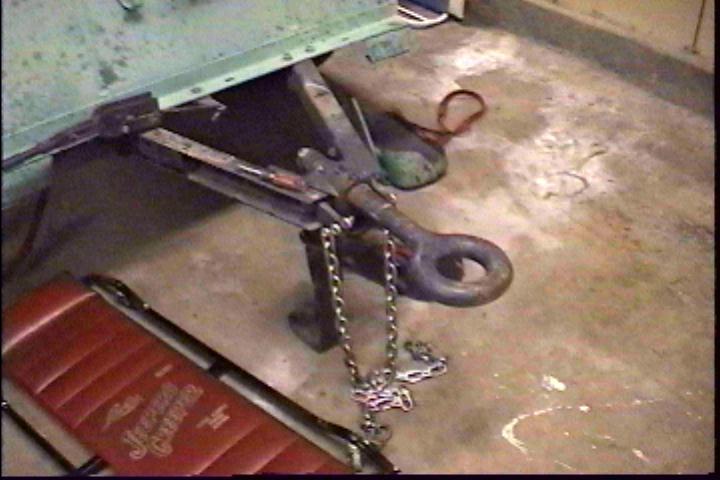
Pic 4 (The pintle hoop)
7/12/98
Today I removed all of the hardware that was used to hold the seven gas cans. All of
that hardware added up to 65 lbs. of extra weight. The trailer then weighed in at
610.5 lbs. Just 1/2 lb. over stock. Then I removed all of the lights and
wiring because it was pathetic. I installed new lights, but they are temporary until
I can find some nice flush-mount lights. I then removed the drain plugs and cleaned
them.
Pictures:
Pic 1 (After I removed 65
lbs. worth of Jerry-can hardware)
7/13/98
Today I welded all of the holes on the tailgate shut to help water tight the bed. I
then test painted the outside of the gate white and the inside black. I think the
white is going to work out just fine.
7/18/98
I cut the six square holes through the floor of the bed of the trailer to mount the pop-up
bed hooks. These little gizmos flush mount in the bed so objects can be stored on
top, or with the push of a little button, a hook pops up to tie the load down. The
holes are about 2" x 1 1/2". To cut these holes I had to mark each corner
of each hole by drilling through. Then I removed the bed and turned it upside-down.
I then used a jig-saw to carve out the holes. When all of the holes were
complete I grinded down the edges and primered the surface to prevent rust. After
the primer was dry I placed the bed back on the trailer frame and bolted it down.
7/19/98
Today I test fitted all of the bed hooks to make sure the holes in the bed were large
enough. Each one came out with good clearance. I laid beads of silicone down
and installed two of the six hooks. Countersink screws go through the flush mount
plate into a bracket under the bed to hold the load down. After the hook is properly
secured, I siliconed the underside of the hook to ensure the waterproofing. These
bed hooks are made from stainless steel so I shouldn't see any rust even if the hooks do
get wet.
7/20/98
Today I finished installing the remaining 4 bed hooks. I then began the patch work
to seal off the remaining holes in the bed. These holes were drilled by a previous
owner to mount the (7) 5 gallon Jerry cans. I wasn't able to finish grinding the
welds flat due to the late hour and my quiet neighborhood.
7/27/98
This past weekend we took the trailer on a four-wheel'n trip that started in Calico, CA
and ended up in Big Bear, CA. I towed the trailer over the three most difficult
trails in Big Bear and it performed perfectly. Now that I know that the performance
of the trailer is what I need, I'm ready to pursue the aesthetics. A gallon on
DuraBak is on the way. After the bed lining is complete I'll work on the white
exterior.
8/16/98
Unfortunately, I was so busy working on the Jeep and Trail'r over the past year that I
didn't keep up with my project updates. Since the last update, the trailer has been
given a Durabak lining, painted Chrysler White (just like the Jeep), had air brakes
installed and it's even been rolled once! I hit a rock unexpectedly while traveling
at about 20 MPH in the desert (at night). The Trail'r did 180 degree roll and ended
up on it's top. Not a lot of damage, but the passenger side fender was
"re-shaped" a bit. I've since smashed it back as straight as I could and
painted it rattle-can white. It almost matches the nice automotive paint perfectly.
The air brakes are incredible. It use to be that when I was descending
a steep
dirt hill, the trailer would push the Jeep around a bit. I installed an air ram in
the trailer and all the logic on the Jeep. Now I have a air pressure regulator
mounted under my Jeep and I can adjust the brake pressure "on the fly".
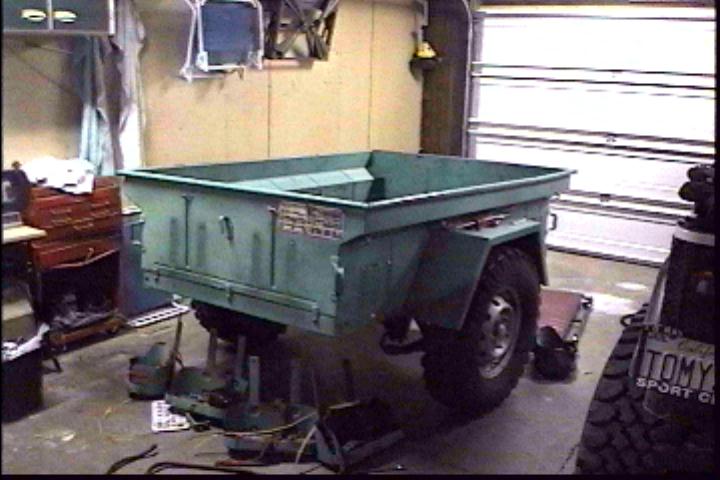
It's not exactly a fool proof braking system, but I sure do like it. Here's a
pic of the Trail'r the
way it sits today.
11/25/01
I finally re-plumbed the Jeep and trailer for faster action on the trailer air
brakes. I changed the pressure switch in the Jeep to an adjustable unit
that goes up to 125#. I also removed all the solenoids from the Jeep and
mounted a new higher pressure one in the trailer itself. Now the trailer
lead hose always has 125# of pressure and the solenoid is mounted directly up to
the piston. The brakes engage and disengage instantly when needed. I
had to change to a 6-wire receptacle and plug to accommodate the electric signal
for the solenoid. Next I'll be utilizing the last wire in that plug for a
regulated pressure solenoid. Currently, it's all or nothing, meaning that
when I hit the trailer brakes, the tires will probably lock up if the load is
light or traction is limited. By mounting a regulator and second solenoid
in the trailer, I can send a "1/2 brakes" signal to the trailer and
apply medium brake pressure.