Flat Skid Plate
(among other
changes)
The goal of this project is to have a custom skid plate, completely flat. To do that, a few other changes need to take place. The body needs to be lifted three inches, so I'm going to make new body mounts. I don't want any pucks. Next, the gas tank will be lifted 3 inches as well (because I can). The engine needs to be lifted 3 to align the driveline correctly. I'm going to relocate the air tank over the rear axle to accommodate a ladder bar. The ladder bar will hinge on the flat skid plate with an inverted shackle. I'm going to rebuild the exhaust system to route around the new cross members and replace the current FlowMaster with a center-in side-out configuration. The York air compressor needs a new mounting bracket because the engine will be closer to the hood due to the 3" engine lift.
11/07/2001 - Started body mount modifications
I removed all the body mount bolts and jacked the body up an additional
1.5". I already had a 1.5" body lift in place. When I was
done lifting, the body had moved forward an inch, so the mounts no longer lined
up. I used the high lift between the swing away tire carrier and the rear
bumper to pull the passenger side back into place. Then I used a chain
wrapped around a fender bar on the firewall, other chain wrapped around the rear
axle and the high lift between them to pull the drivers side back into
place. Next I removed the air tank since it'll mount above the rear axle
later on.
11/08/2001 - Started making body mounts
This afternoon I went to the metal shop in town
and picked up 70 lbs of 1/4" plate material.
Tonight I started the construction of the body mounts. I began with the middle side mount on both sides. I cut most of the metal pieces and welded them together. I don't have the 1.5" hole saw yet to make the hole.
11/09/2001 - Welded on middle body mounts
I picked up the 1.5" hole saw today
Tonight, I prepared the area where the middle mount goes and welded on the middle body mounts on both sides.
11/11/2001 - Body mounts and gas tank relocation
I started by making the rear-most body mounts.
I used 3"x3"x0.125" box tubing to make each mount. Then I
used the same box material and cut it into a "U" shape to make the
center section between the mounts. Inside each body mount is a 2"
pipe with a 0.1875" wall for strength. I used 0.25" plate to box
the ends. I drilled the hole for the 6-plug tow receptacle.
Eventually I'll mount some LED brake lights in this middle panel.
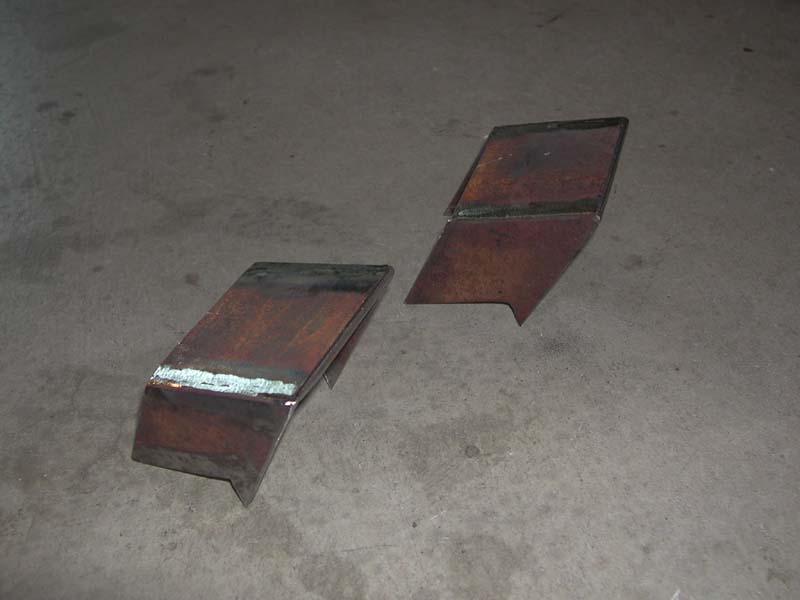
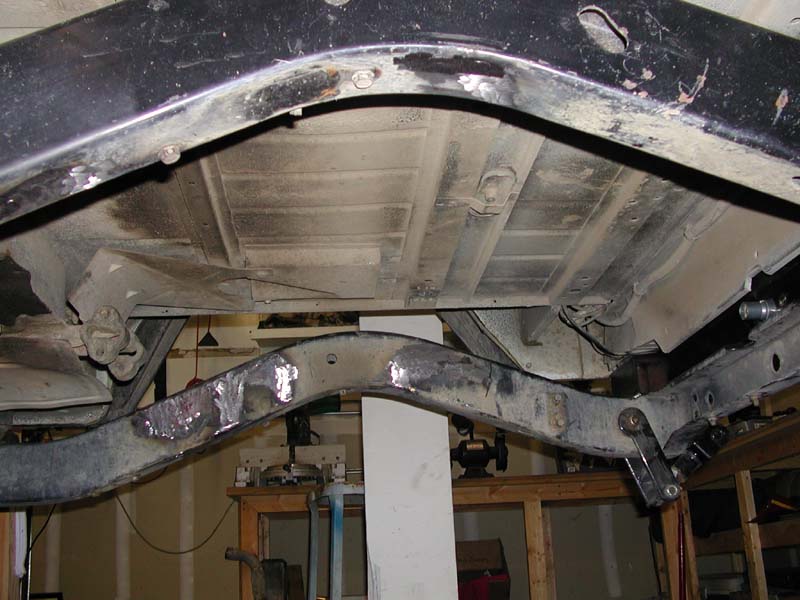
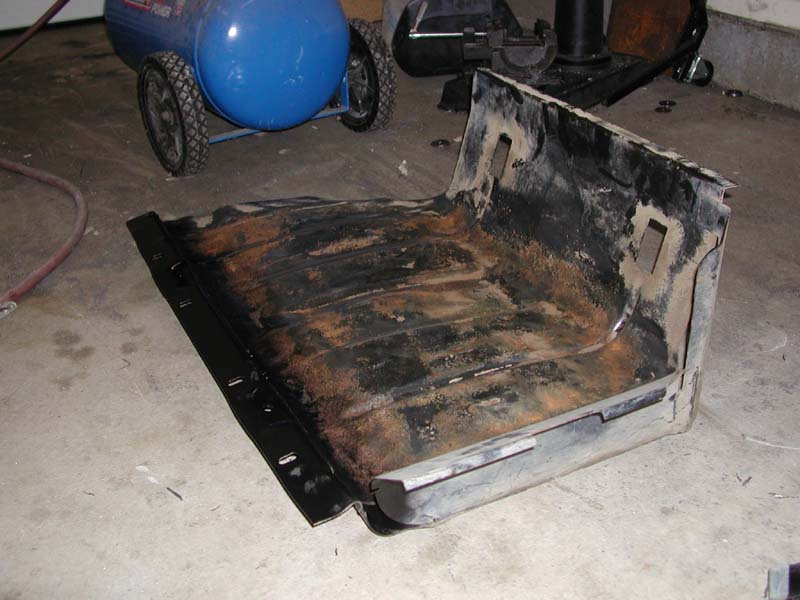
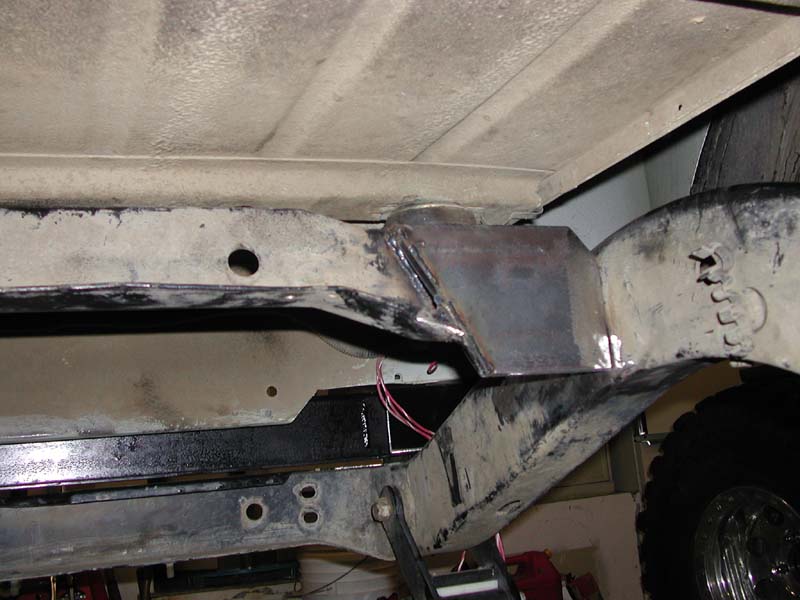
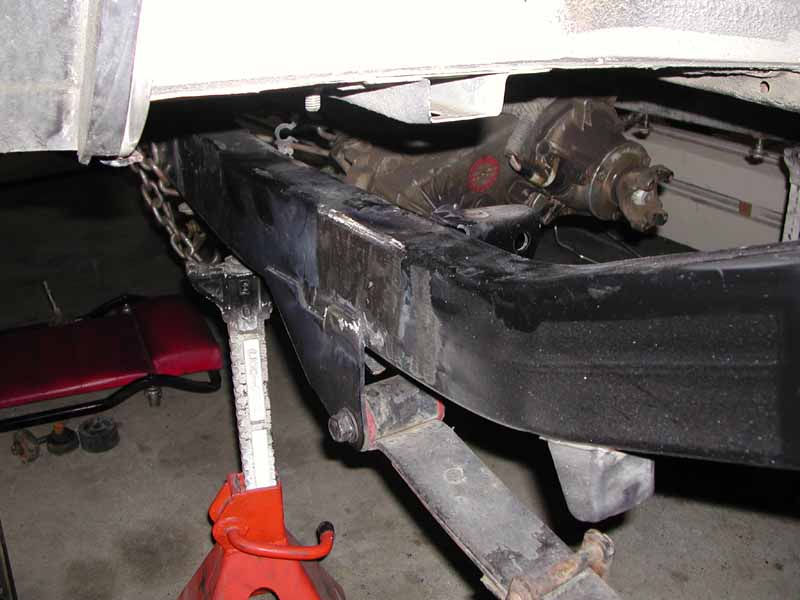
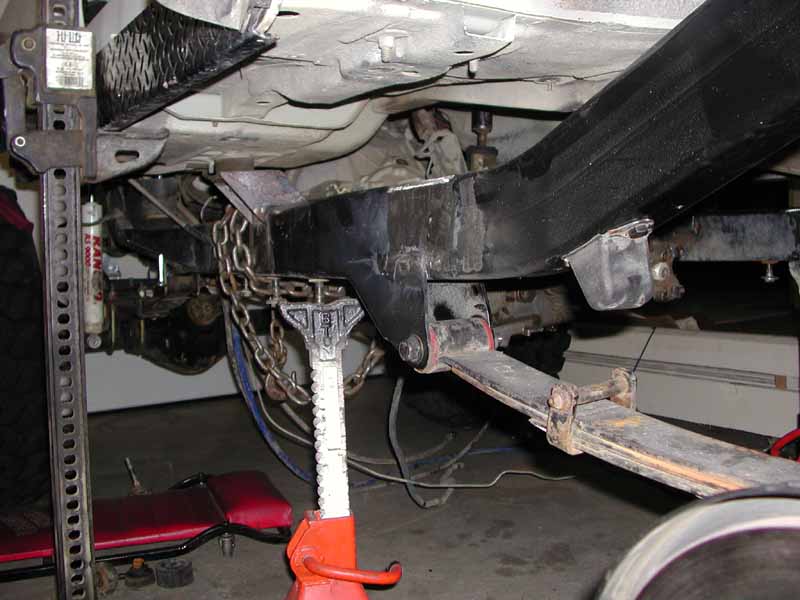
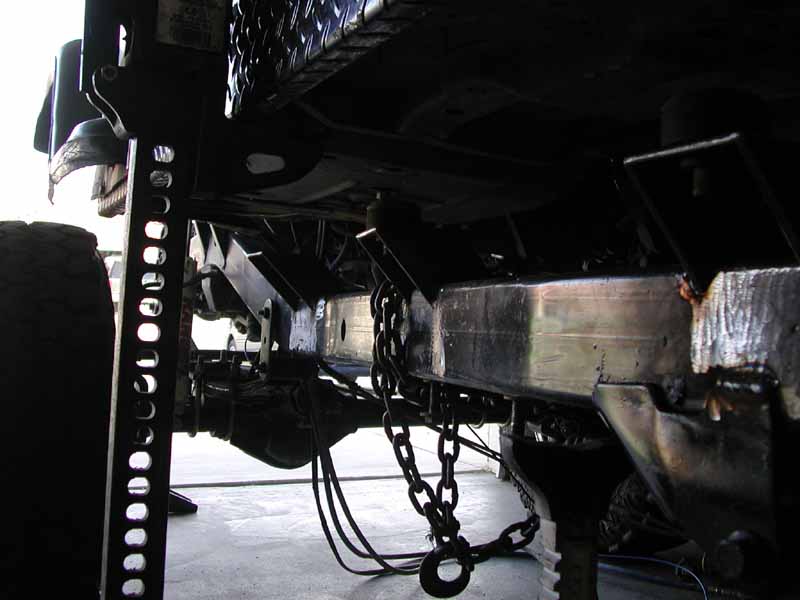
Next I moved on to the gas tank and body mounts just forward of the gas tank. I removed everything that was bolted on, including the rear axle and leaf springs. After measuring everything, I cut out the forward gas tank mount and the body mounts attached to it. I'll be reusing the middle section of this cross member, which is why it's cut the way it is. Here's a couple pictures of the cleaned out under section of the Jeep - Pic1 & Pic2.
I think I found a clunk that I've had in my Jeep for a couple years now. The forward spring hanger for the drivers side rear leaf spring has worn into an oblong hole. I'll have to weld on a nice thick washer to repair this.
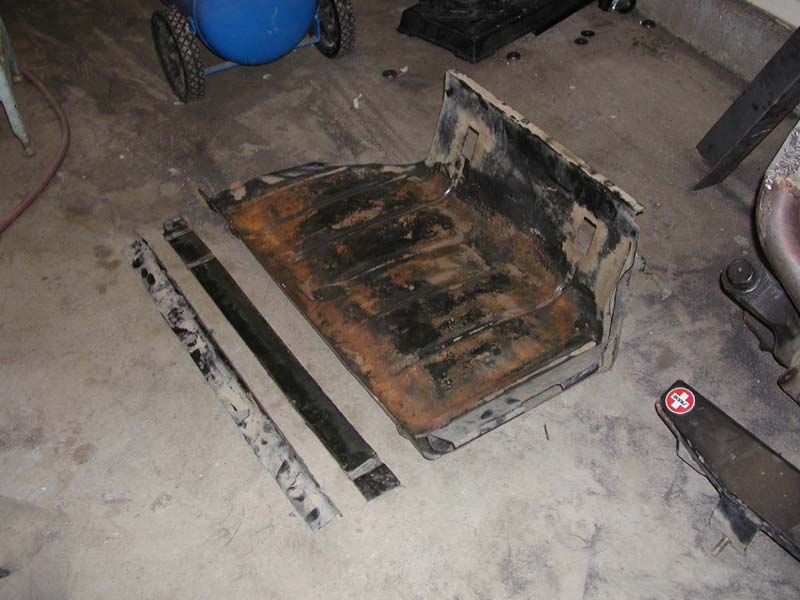
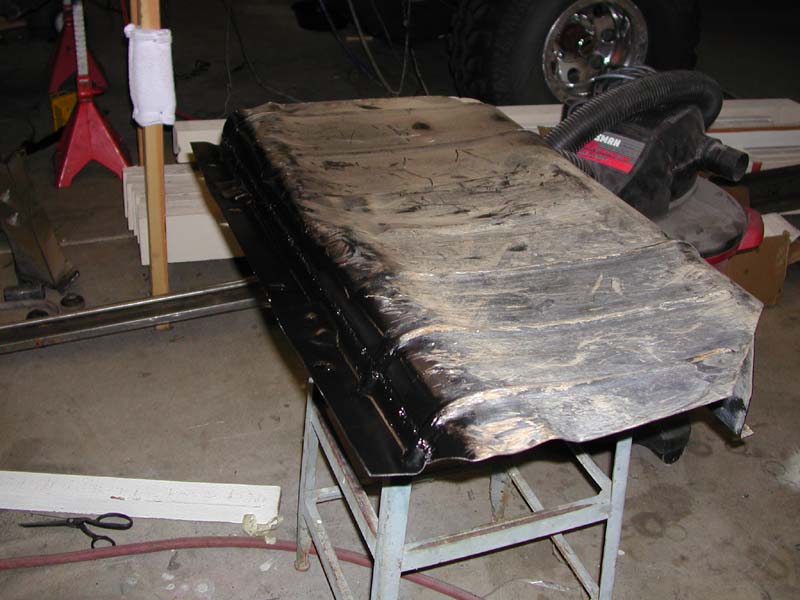
Next I cut the gas tank cover down to size. I cut 2.5" out of the rear of the cover and I welded it back together with a 0.5" overlap. This will make up the 3" difference I'm looking for. Here's a couple more pics of the gas tank cover - Pic1 & Pic2.
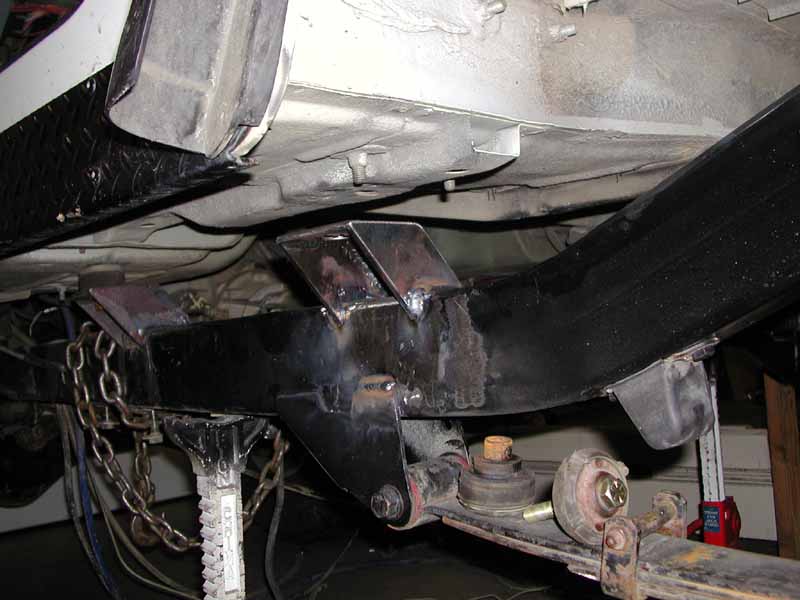
11/12/2001 - Gas tank mount / Body mount
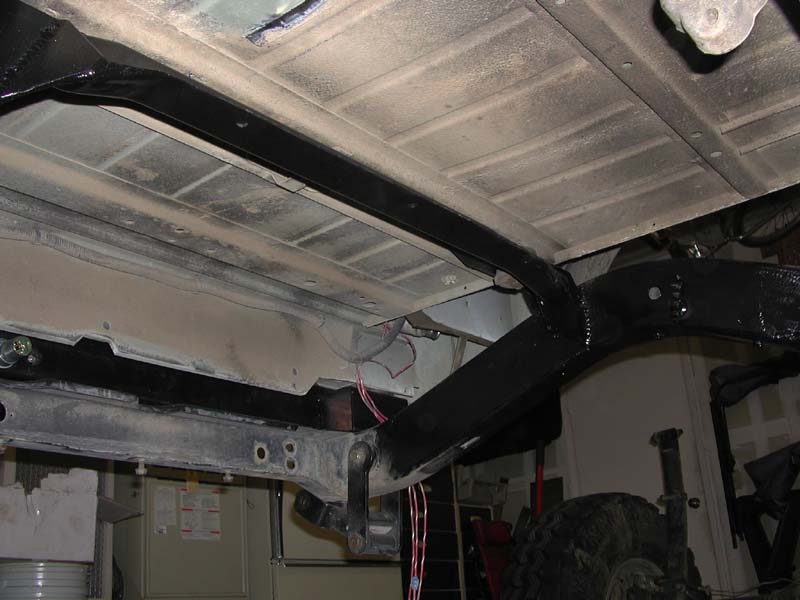
I continued work on the cross member that is both a body mount and the forward
gas tank mount. I'm using the original center section of this cross member
and fabricating my own body mounts. Here's a few pictures: Pic1,
Pic2 & Pic3
I also used a 6"x6" block of wood and maul to pound out the gas tank
cover dents. Next, I cut the gas tank straps and added 3" of material
so they could reach to the relocated mounts on the tank cover.
11/13/2001 - Skid plate ordered : Gas tank mount / Body
mount installed
Eric and I went to EBL Fabrication to talk skid plates. Balt is going to
bend up a 1/4" plate in all the right places and I'll make the final trims
and drill the holes. Hopefully he can turn this around in a few days.
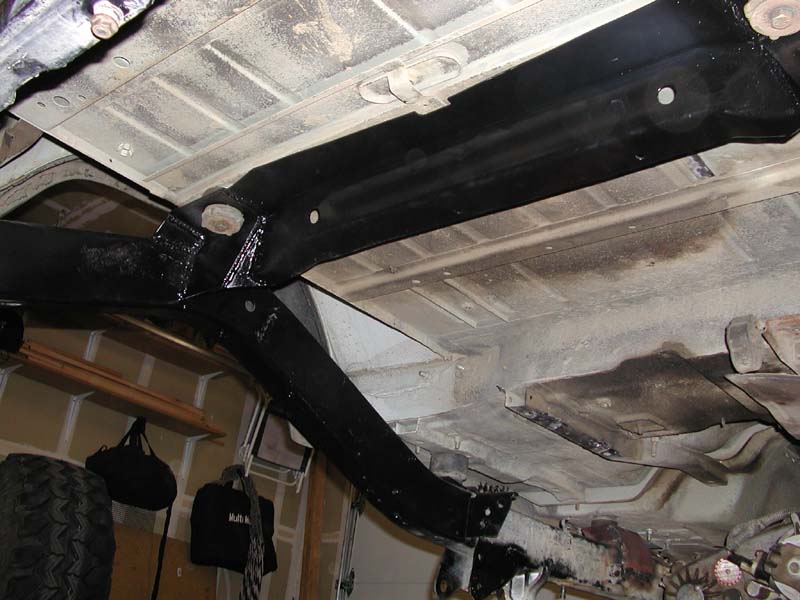
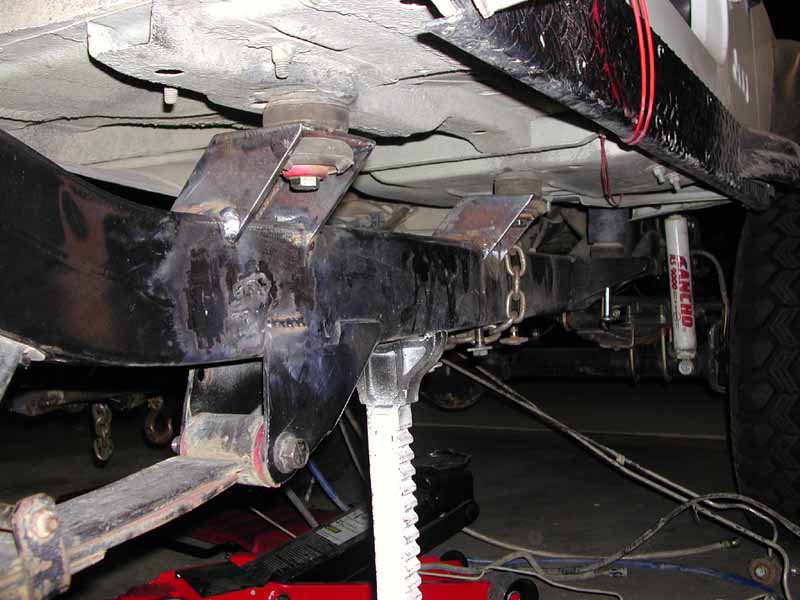
Tonight I finished the fabrication of the gas tank mount /
body mount, installed and painted it. Pic1, Pic2,
Pic3, Pic4, Pic5
& Pic6
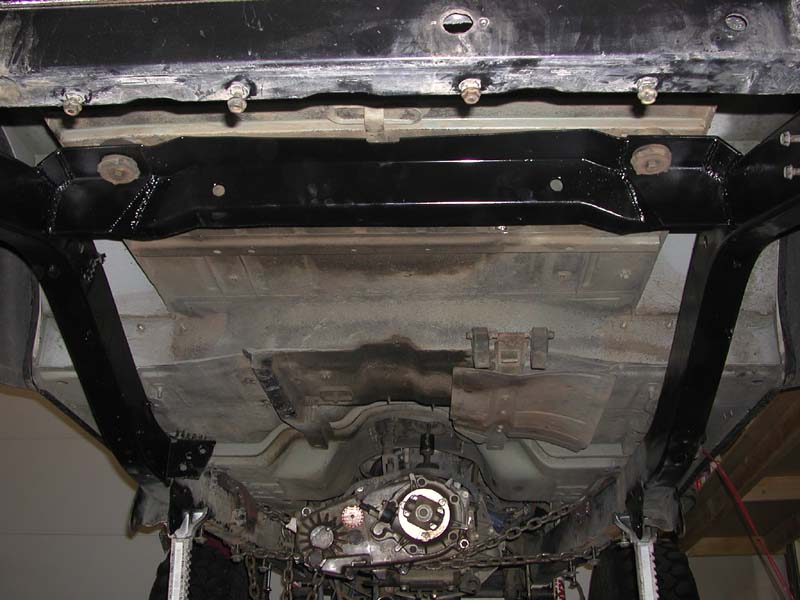
Next I installed the rear axle and gas tank to check
clearances and to measure where the shock cross member will mount. Pic1
& Pic2
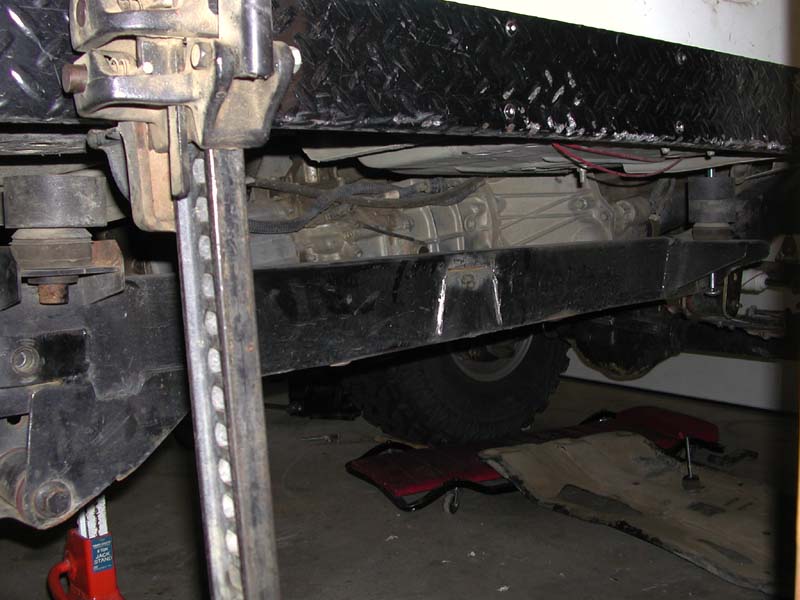
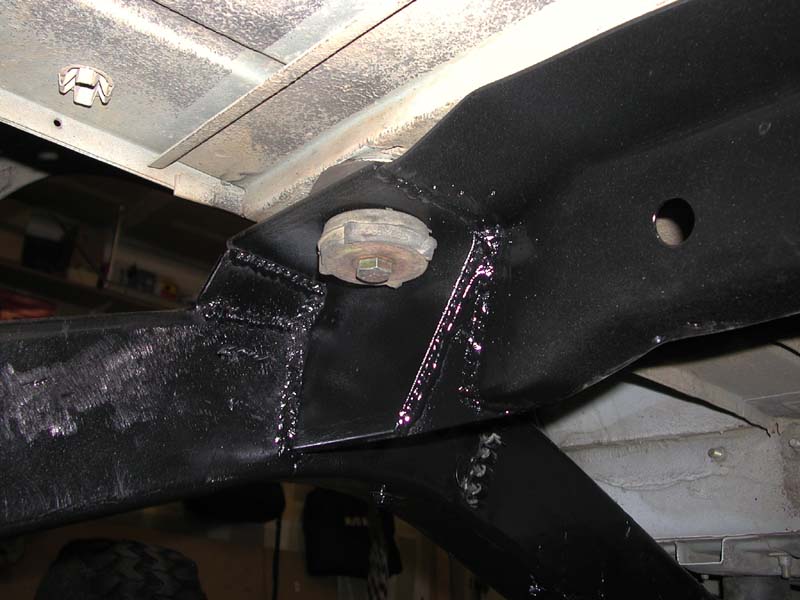
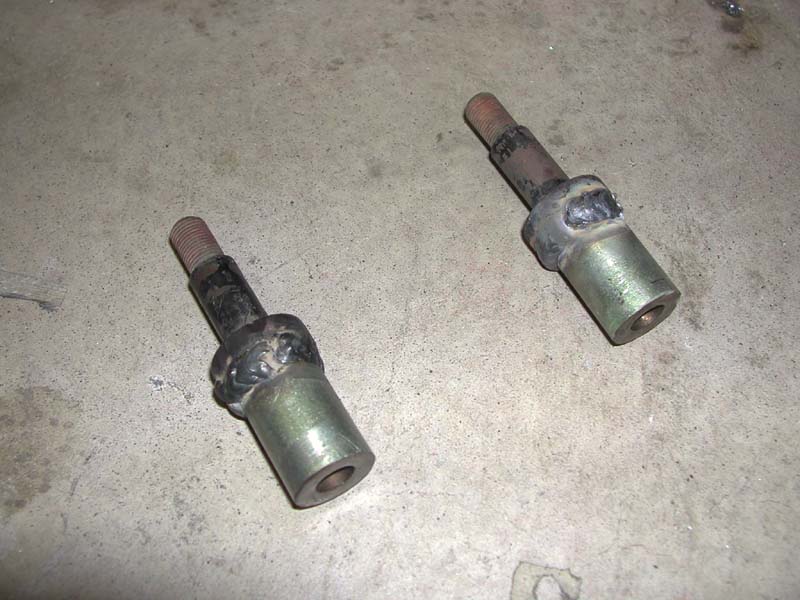
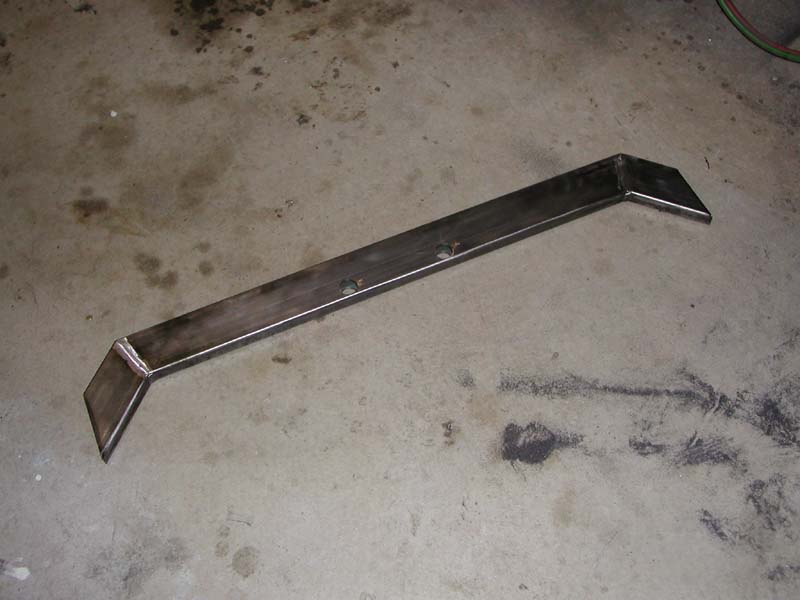
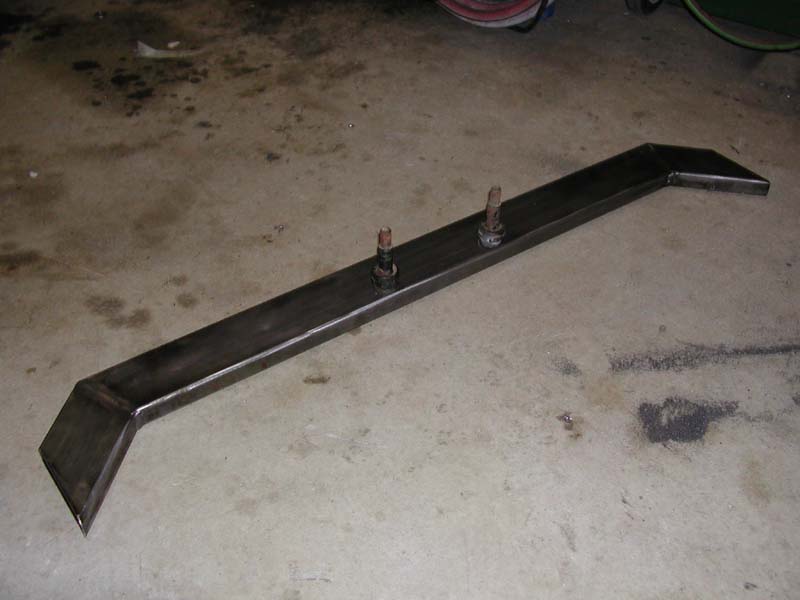
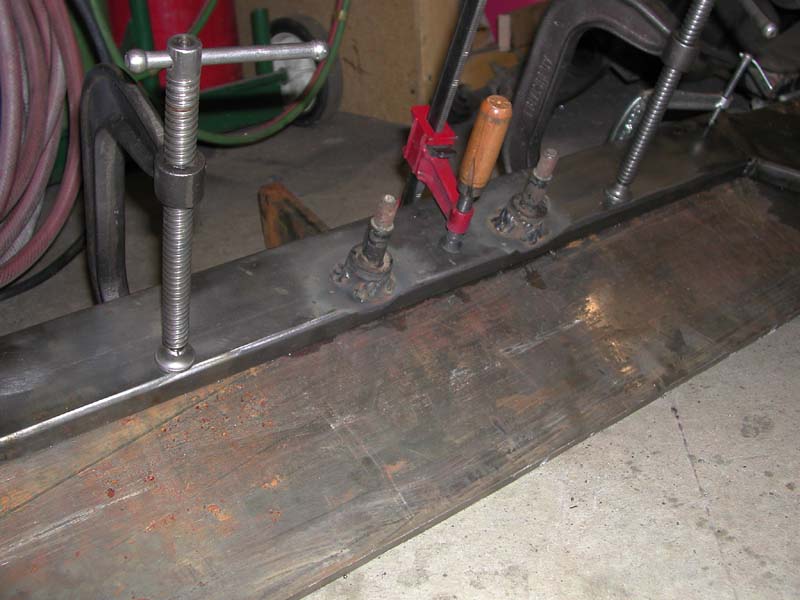
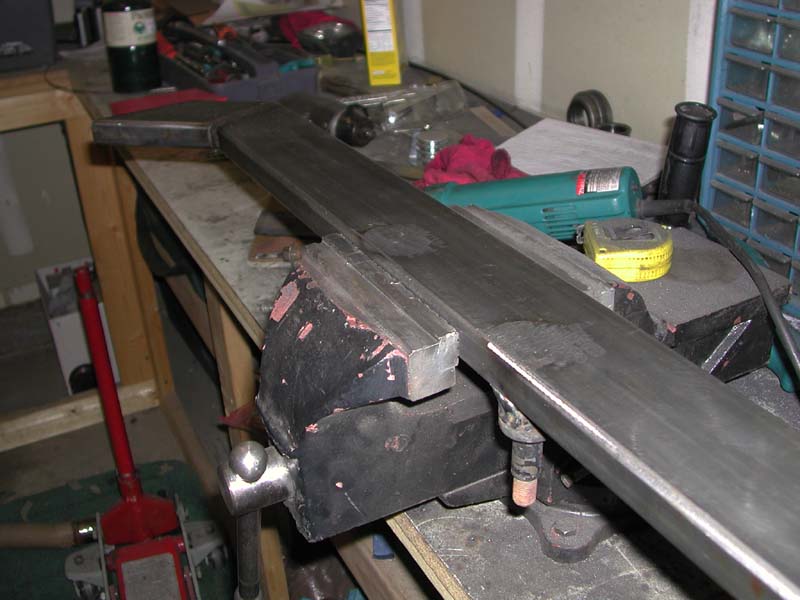
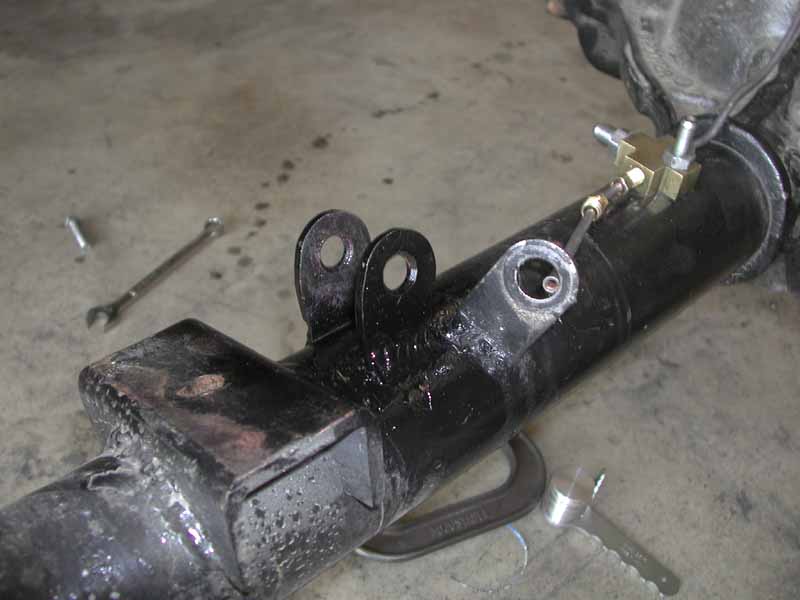
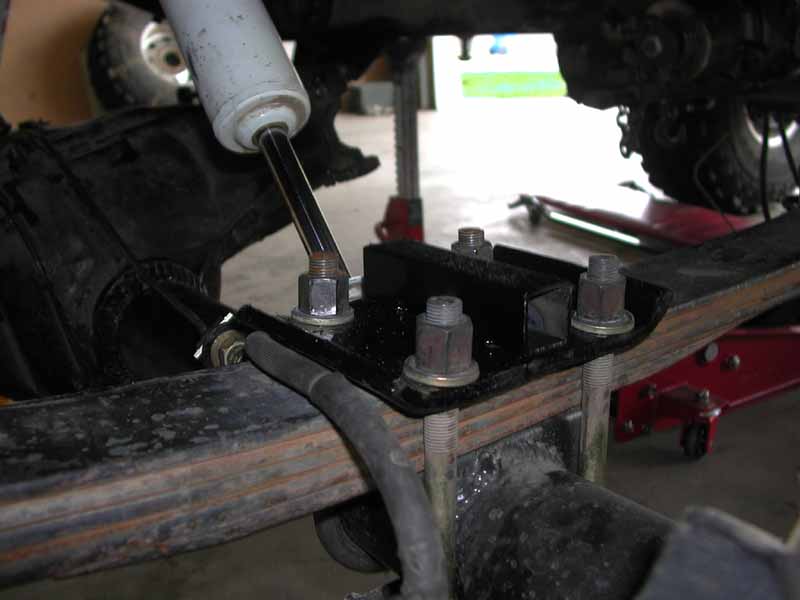
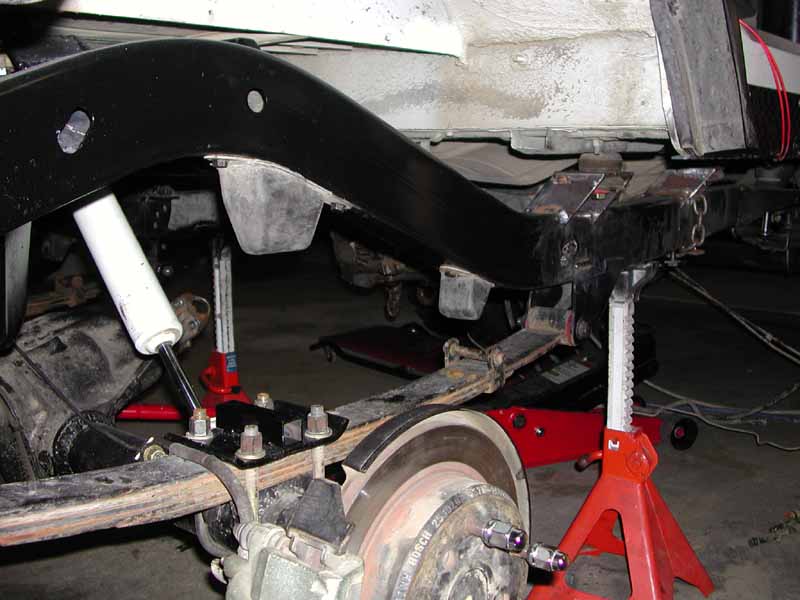
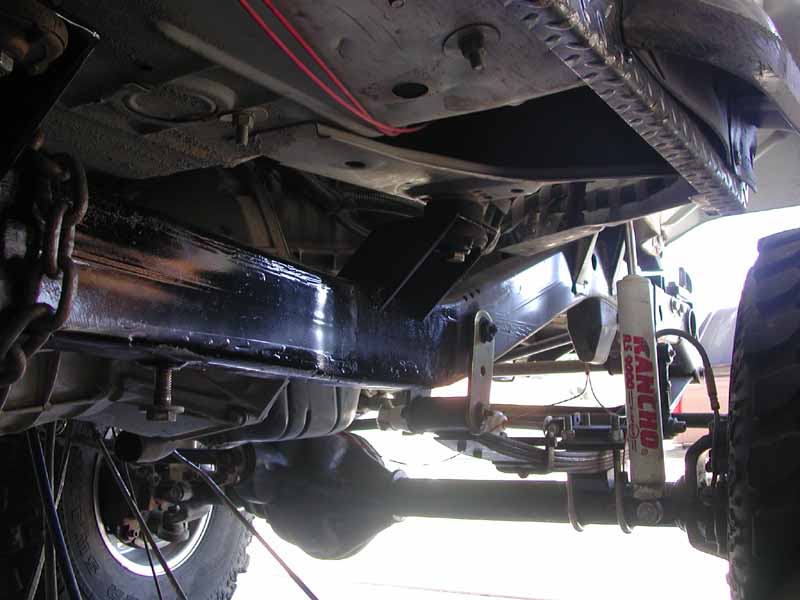
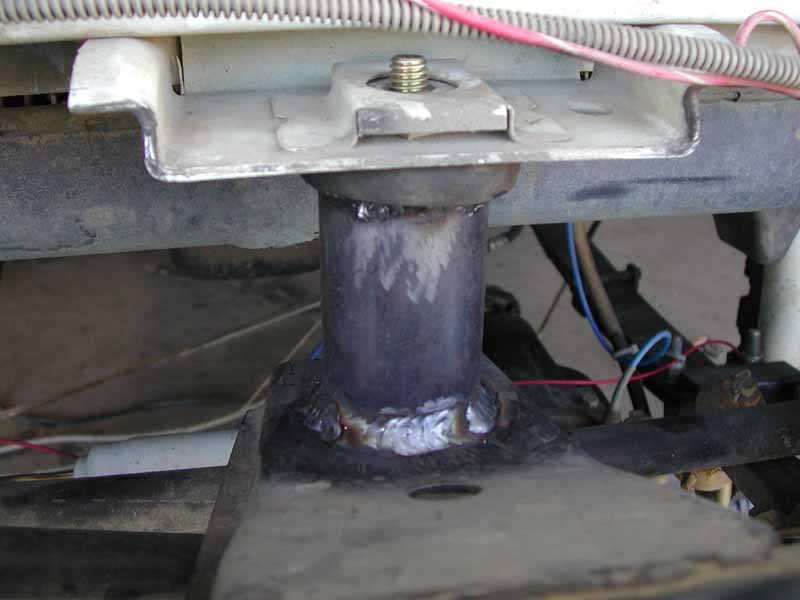
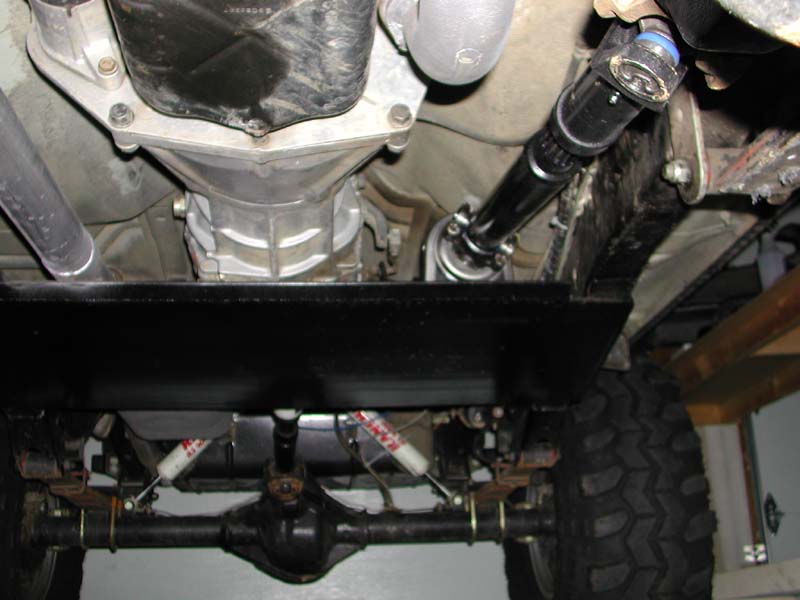
11/14/2001 - Rear shock mount cross member
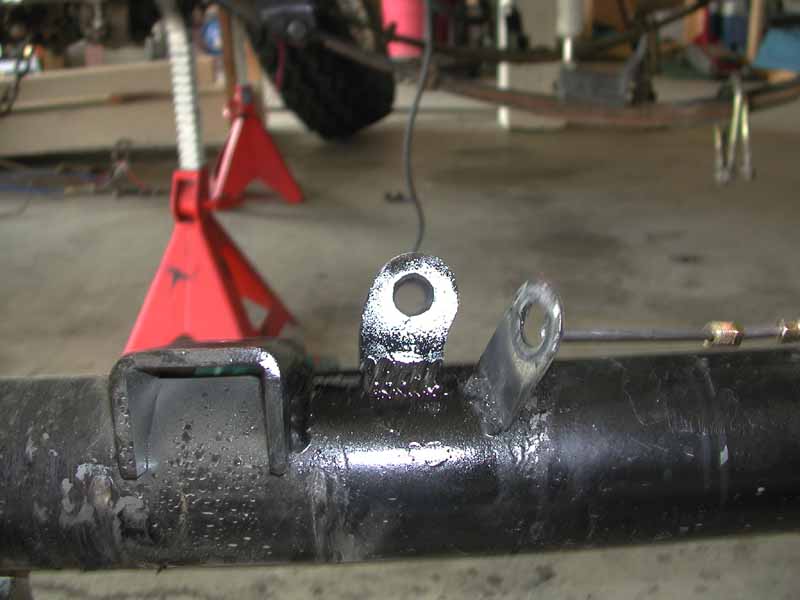
I began construction of the rear shock mount cross member. I'm making this
mount out of 1"x3"x0.125" material. I cut the original
shock mounting studs off the stock mounting brackets that I cut off the other
night. I needed a little more clearance so the shock wouldn't interfere
with the cross member, so I added a 1.5" spacer to the base of the
studs. This spacer will run completely through the cross member and weld
on the back side as well. After welding the spacer
to the studs, I designed the cross member in AutoCAD and printed out the
dimensions. I cut the three pieces and welded the structure
together. After figuring out the best location for the upper mounts, I drilled
the 1" holes completely through the cross member. Next I tack
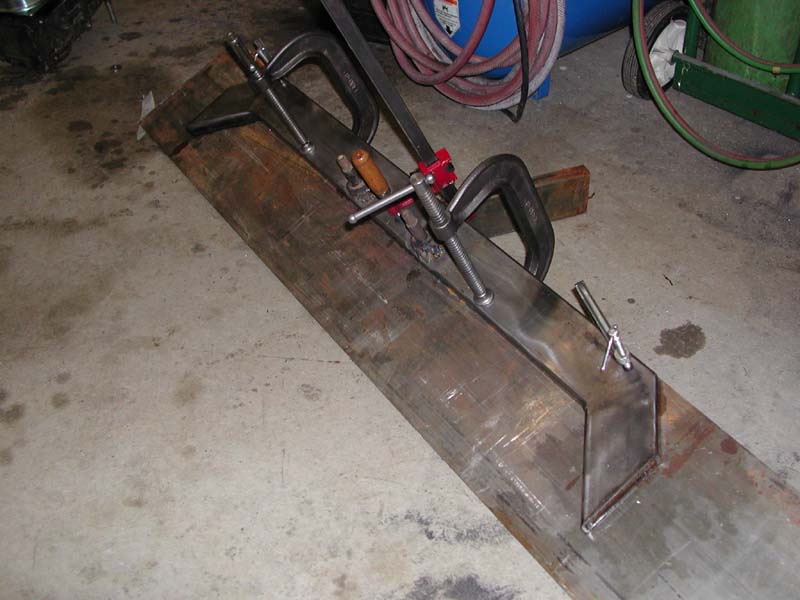
welded the studs in place. I was concerned about warping the cross
member with the heat from the welds, so I clamped the
cross member to a 48"x9"x0.50" plate.
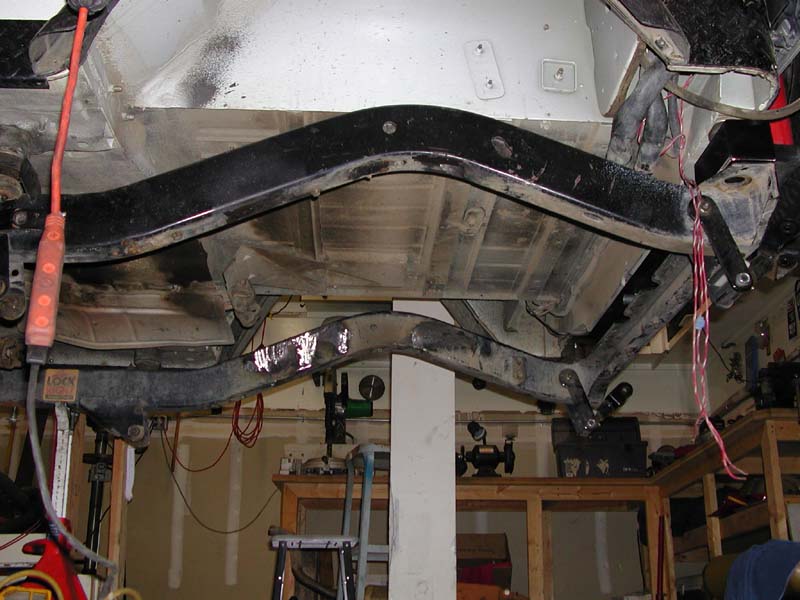
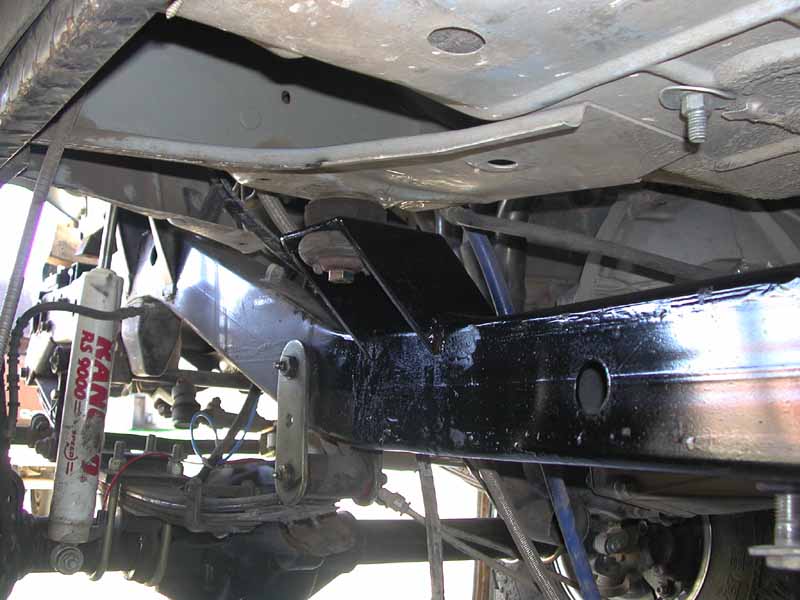
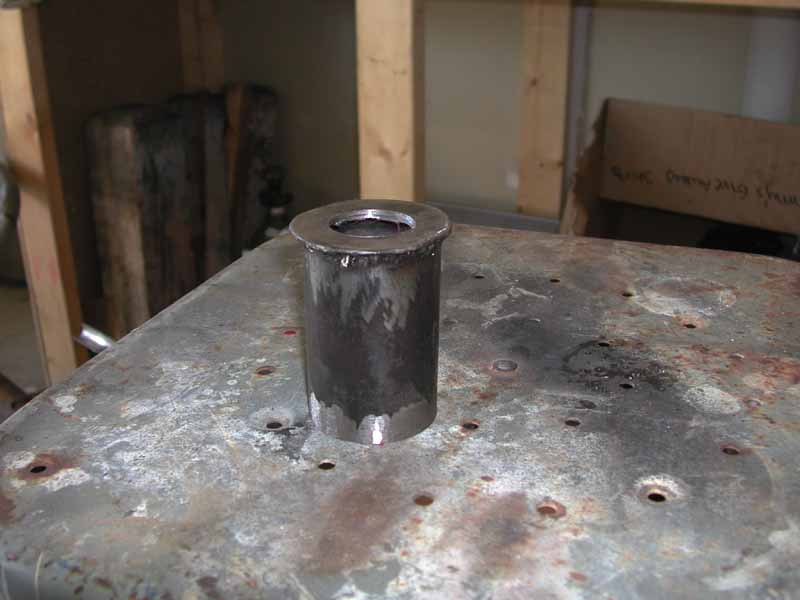
11/15/2001 - Rear shock mount cross member / Air tank
mount
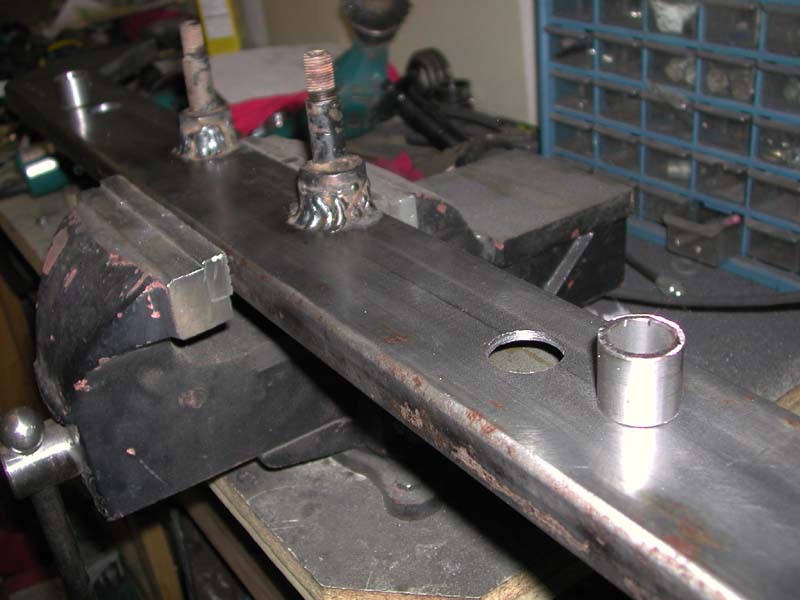
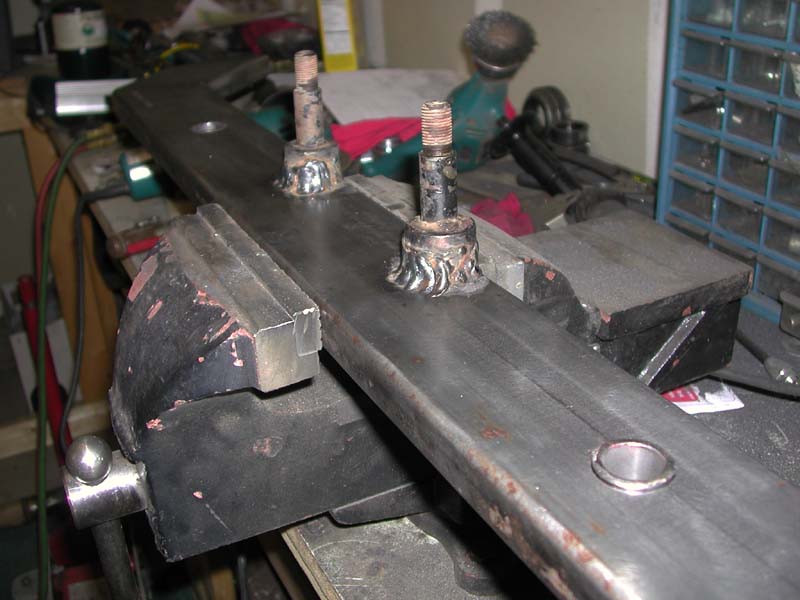
At lunch today I welded the back of the shock mount
studs to the cross member. I had left this assembly in the clamps all
night so it could cool without warping. Tonight I started by grinding
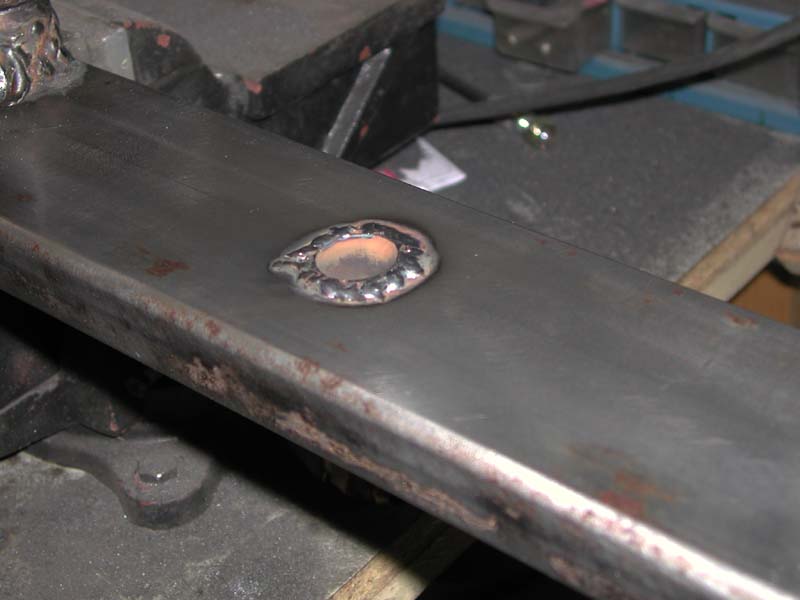
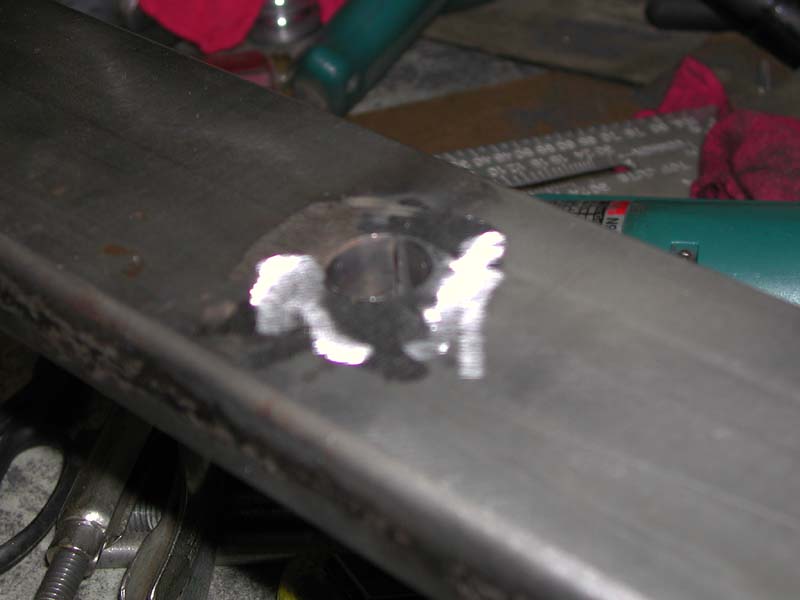
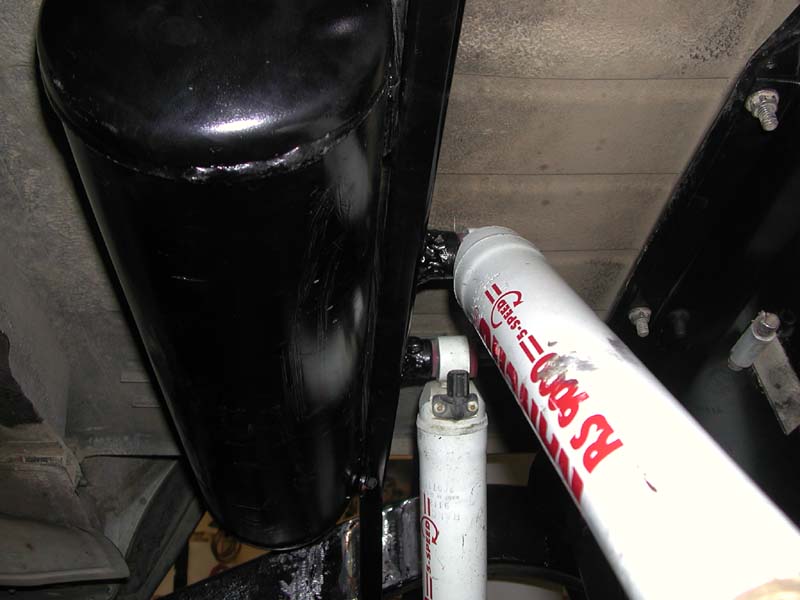
down those welds. Next I began work on the air tank mount. I
decided to drill a 1" hole through one side of the cross member, and a
5/16" hole through the other side. I then put a sleeve inside the
1" hole. This sleeve is mainly to keep the nut that holds the tank on
from falling inside the cross member when installing the air tank. Here's
the 1" hole and sleeve and another pic of it
installed. After welding the sleeve in, I
used the 4" grinder to flatten the area.
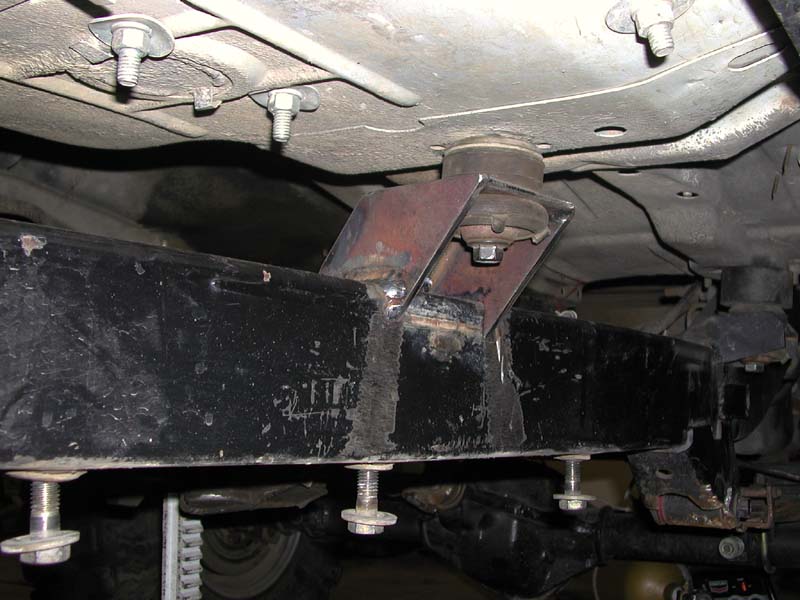
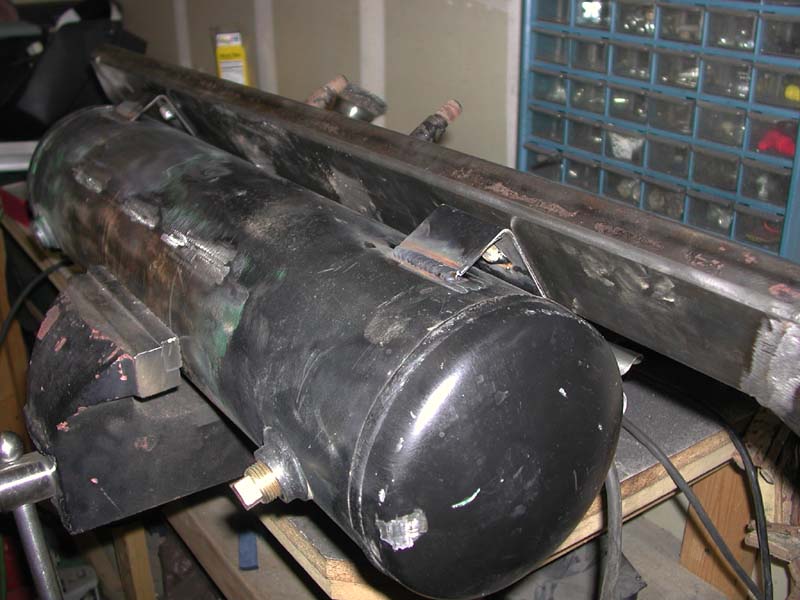
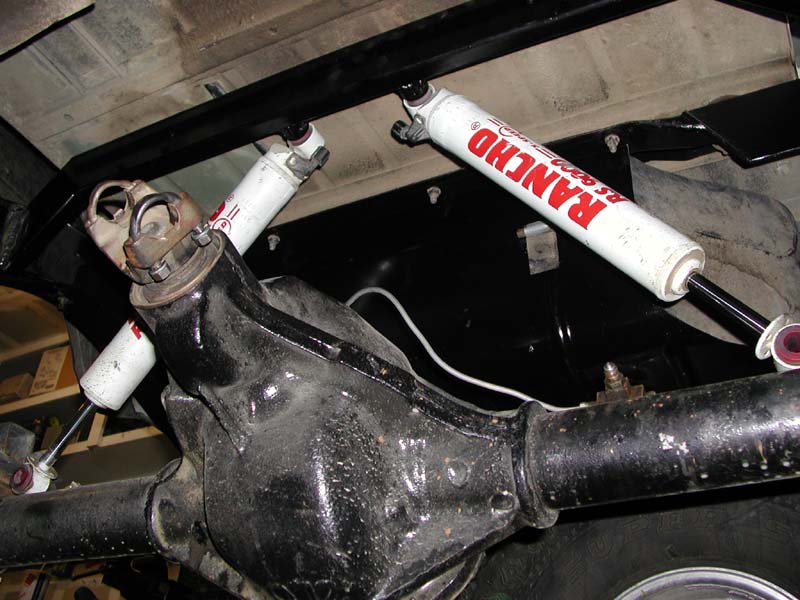
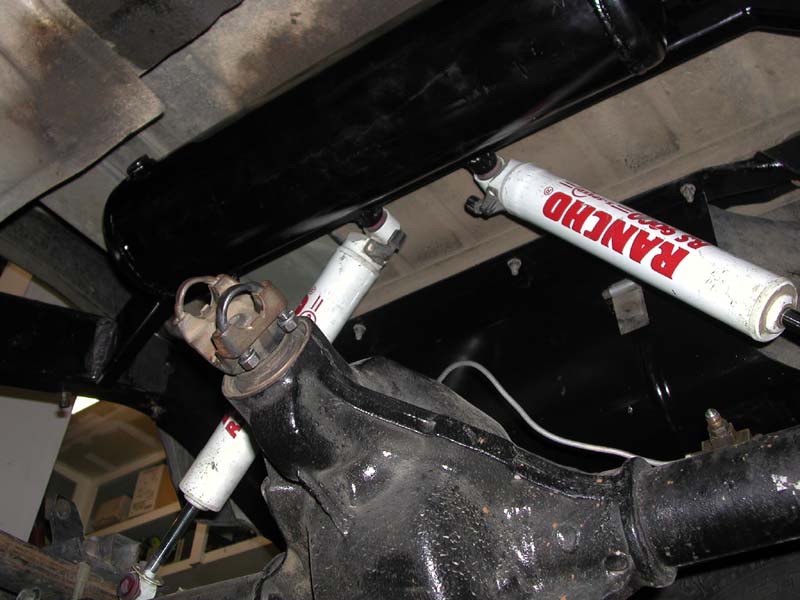
Here's a couple pictures of how the air tank mounts. Pic1
& Pic2 Before installing the cross member,
I used the wire wheel to clean up the assembly and
then painted most of it. Here's a picture of the cross
member installed, installed with shocks and then with
the air tank. Here's another from the side with
the shocks and air tank. Next I cut down some aftermarket lower shock mount
tabs to fit my application and tack welded one on each side of the axle. I then
removed the axle in preparation of cutting off the old lower shock mounts and welding
on the new.
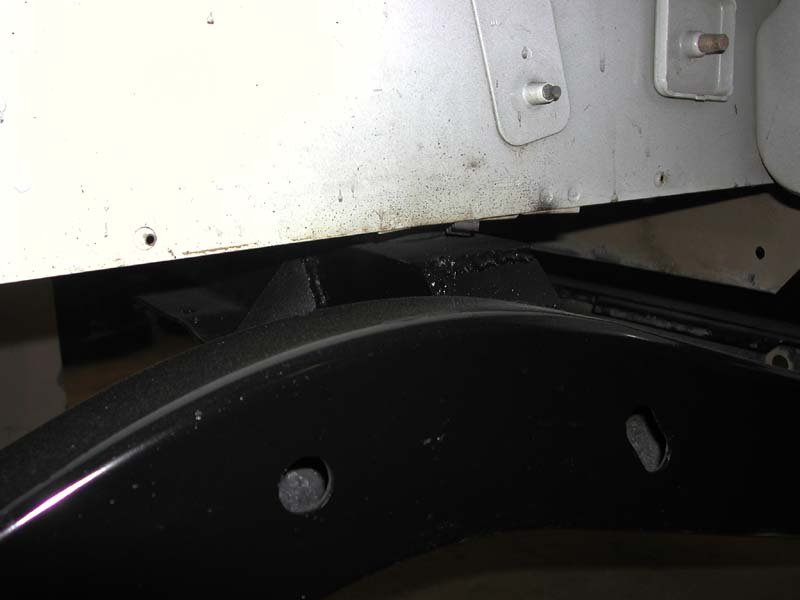
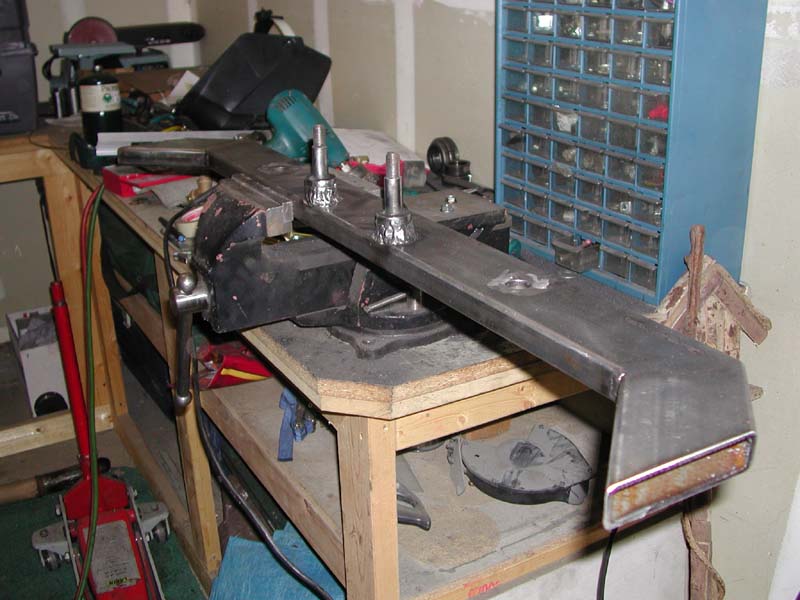
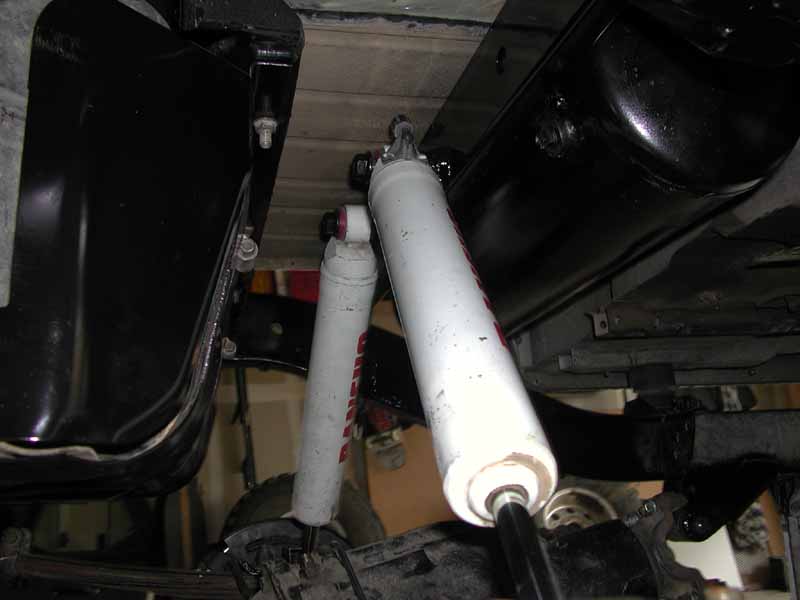
11/17/2001 - Rear lower shock mounts, More body mounts
I started the day by working on the rear lower shock mounts. Here's a
couple pictures of the mounts relocated to the top of the axle. Pic1
& Pic2. Here's a couple of the shocks
installed, upper & lower.
Next I went to work on the u-bolt plates. I use to have an attachment
point for a kicker bar, but that didn't work. I cleaned up the mount and
added a new bump stop contact point. Here's a
pic of the bump stops installed. I began work
on the body mounts located toward the rear of the rocker panels. Here's a
couple pictures of the preparation, Pic1 & Pic2.
After making the mounts, I welded them on, Pic1 & Pic2.
On the drivers side I had to cut away part of the parking brake bracket for
clearance and weld
it to the new body mount. Next I have 3 pictures of the body mount
damage I've done over the years with the 1.5" body lift pucks installed, Pic1,
Pic2 & Pic3. The
reason I'm making new body mounts is to prevent further damage like this in the
future.
Towards the end of the day, my Argon/Co2 bottle ran out. Today is Saturday and no one is open on Sunday to fill the bottle. Darrin is coming and bringing his bottle with him, but he thinks it's nearly empty. Might not get much welding done tomorrow.
11/18/2001 - Forward Rocker Body Mount
Darrin came over today to help with the Jeep. He brought his Argon/Co2
bottle, but we didn't need it until the end of the day. There was more gas
in my small bottle then I thought. Darrin and I managed to finish the last
of the rocker body mounts. Here's some shots of them. Pic1,
Pic2, Pic3, Pic4
& Pic5. Here's a shot of Darrin
with a goofy grin. After Darrin left, I worked on taking the front end
apart. The only body mounts I have left is the ones under the
grille. I also removed the batteries and the dual battery tray. I
need to draw this up for future manufacturing. Thanks for the help today
Darrin!
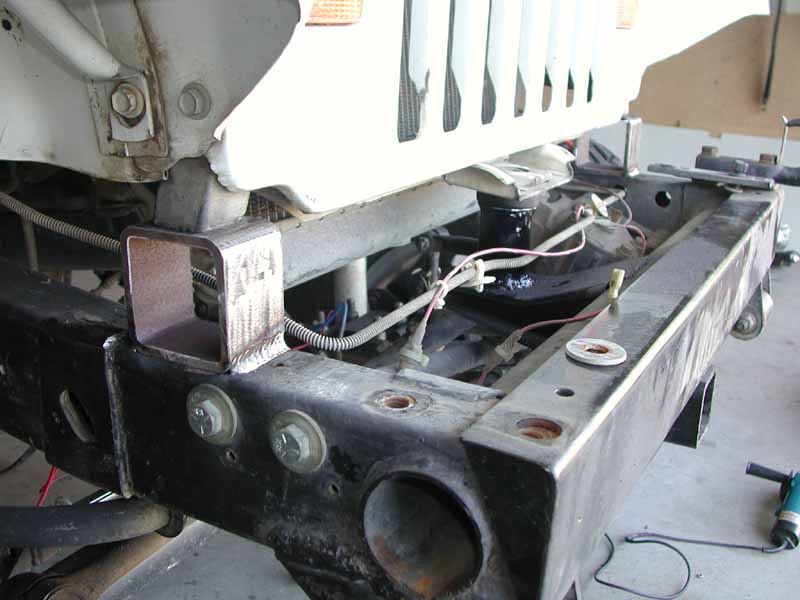
11/19/2001 - Grille supports, Rear frame cross member
I began the day by running errands. I filled the gas in the Oxy bottle,
Argon/Co2 bottle and the smallest bottle I had filled with 100% Argon for
aluminum welding. I also picked up some grinding wheels and stopped by EBL to
see how the skid plate is going. Balt said he's going to have to weld this
one because his break can't bend 0.25" material over the length we need.
He's going to get the tool so in the future we can. Work began on the
grille supports. I welded a tube to a flat plate for the center support
and welded the assembly to the Jeep frame. Pic1,
Pic2 Next I made the side
grille supports out the 3"x3"x0.25" box, and painted
them.
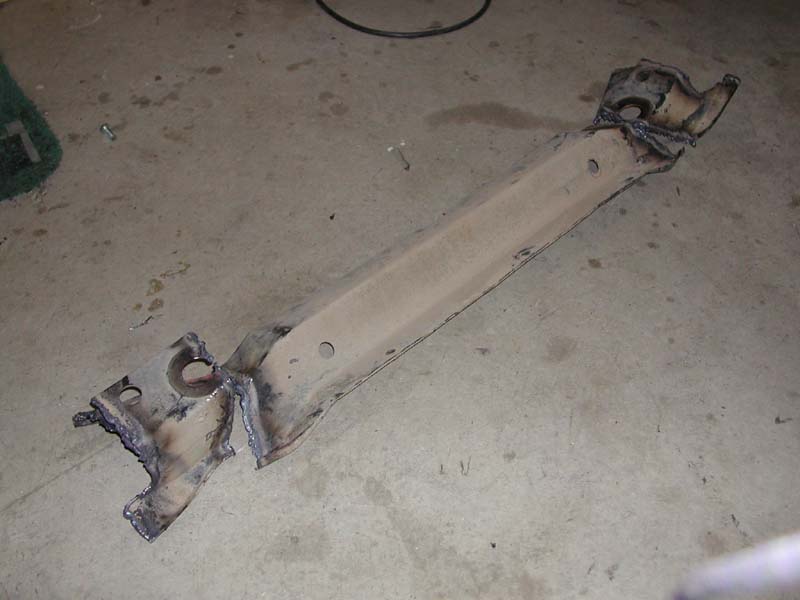
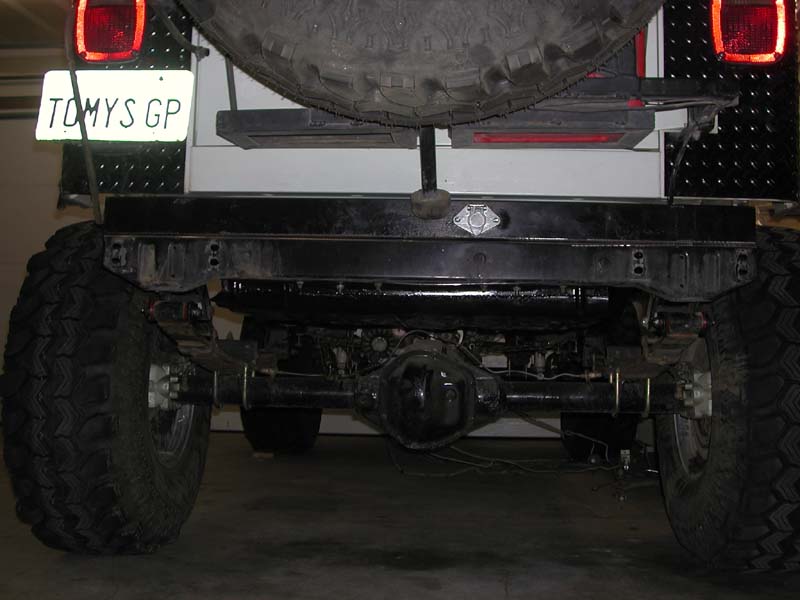
Next I went to work on the back frame cross member. I welded my new piece of 3" box to the existing frame cross member. I wanted this seam to look as clean as possible, so I slowly welded the entire seam and used the 4" grinder to smooth it out. I originally had a 4-plug trailer receptacle mounted in the frame cross member, but I've since covered that area with the bumper. Since I moved the new 6-plug receptacle up into the new 3" piece, I wanted to seal up the hole. Here's shots before and after I patched the hole. Here's two shots of the finished cross member without the bumper installed. Pic1 & Pic2
The last thing I did today was to make the 3" engine lift. Eric had some drawings from when he made his, so I just followed the drawings and made myself a set. The material used is 3"x3"x0.25" box.
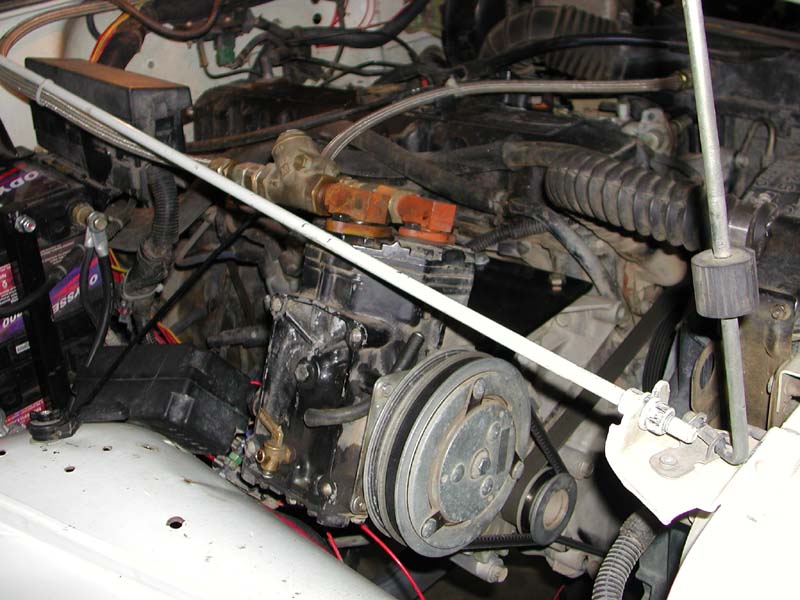
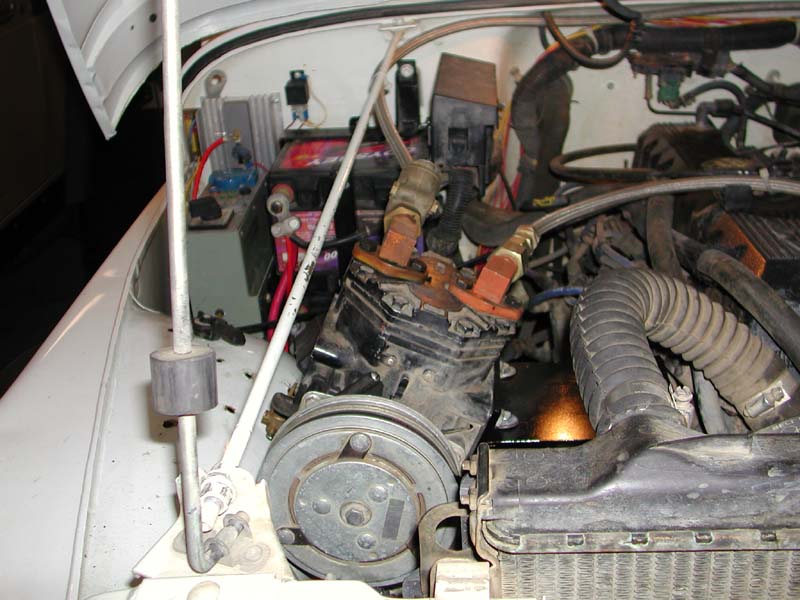
11/20/2001 - Engine lift, York mount
I had to turn the Jeep around in the garage to get the engine under the beam
in the garage. Natalie helped and we used the floor jack under the axle to
turn the Jeep 180 degrees. This was all so I could use the winch, through
a pulley hanging from the beam to hold the engine up while I installed the
3" engine lift. After the engine lift was done, I started laying out
the pieces of the York air compressor mount. I don't want to run it
completely sideways and I can't run it completely vertical. I drew up a
design on CAD with the York leaned over towards the engine at a 30 degree
angle. This allows the bottom of the compressor to run next to the
alternator, and lets the top of the compressor miss the grille support rod that
runs to the firewall.
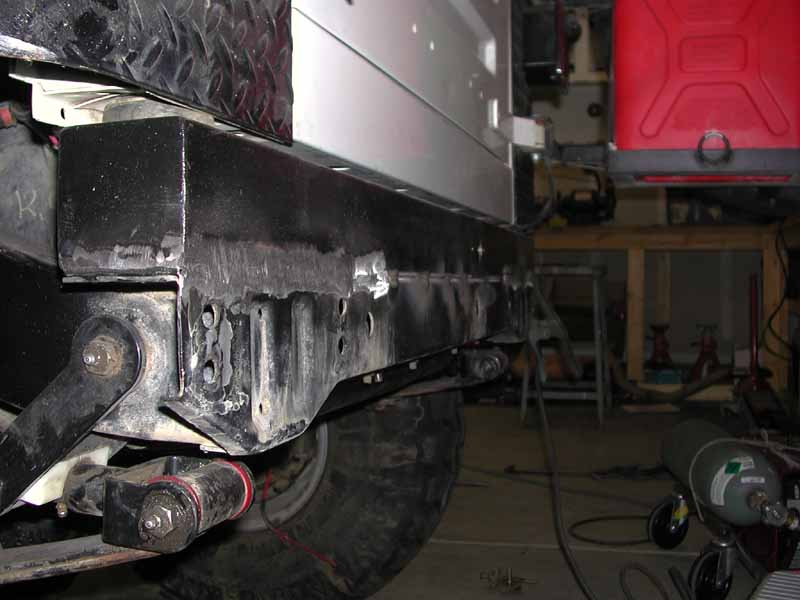
This evening I went to EBL and picked up the prototype skid plate from Balt. He doesn't have the tooling to bend the 0.25" plate so he had to weld it together. Unfortunately, when he welded it, the sides bowed in a few degrees. I'll have to work with it to clear over the frame.
11/21/2001 - Skid plate
My Nikon CoolPix 880 digital camera crapped out on
me. Some of the following pictures have been taken with the Sony Digital
cam-corder. Quality lacking.
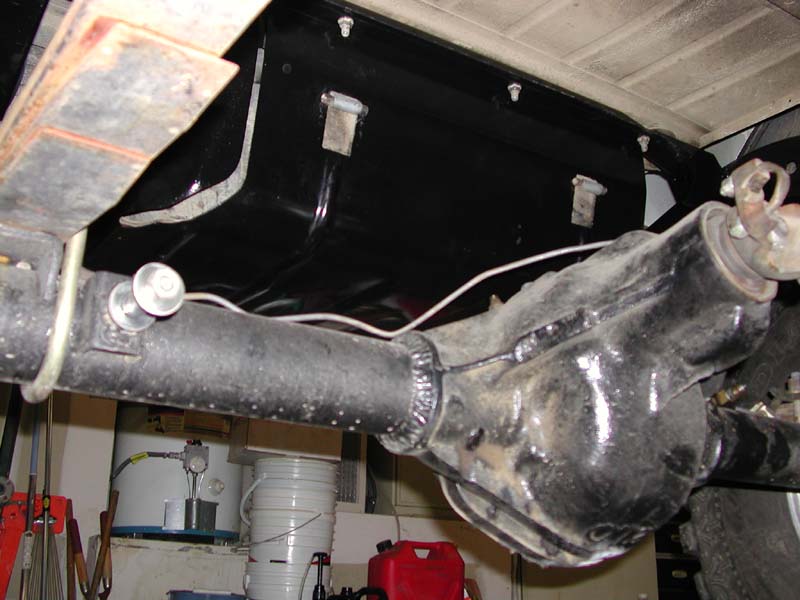
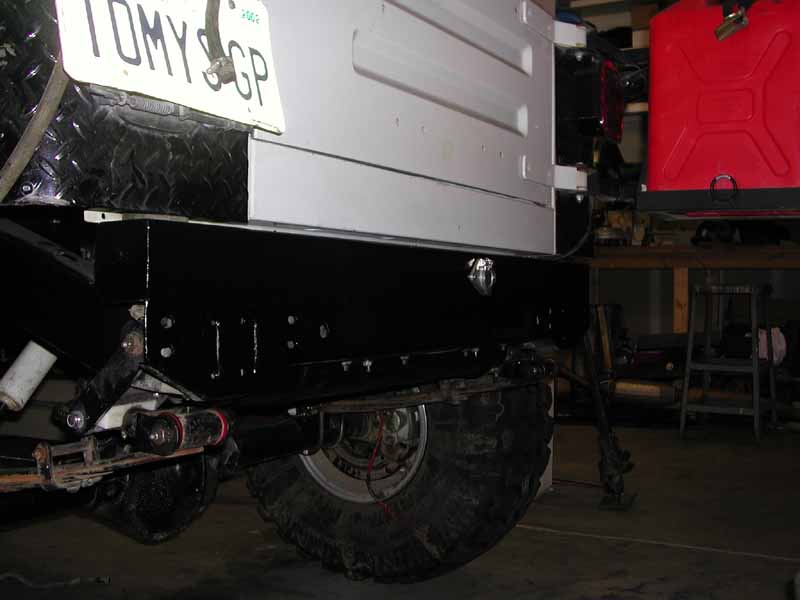
Here's how the skid plate looked from EBL: Pic1, Pic2 & Pic3 Here's how the tranny mount bracket looks on the skid plate: Pic1, Pic2 & Pic3 I tried my best to use the skid plate with the 5" sides to mount on top of the frame, but couldn't do it. I cut the sides down to about 2.25". Then I drilled 1" holes completely through the frame and welded in 1" pipe spacers. This leaves about a 3/4" hole for the skid plate bolts. The pipe keeps the frame from compressing when I tighten the bolts. Next I routed the fuel lines and rear brake line. The fuel line between the tank and fuel filter was a pain in the butt, so I replaced it with all rubber hose. Next I installed the fuel tank with the hoses attached.
11/23/2001 - Broken camera, Misc re-assembly
Natalie boxed up the digital camera and sent it off to Nikon
today. Hopefully it'll be back before Christmas.
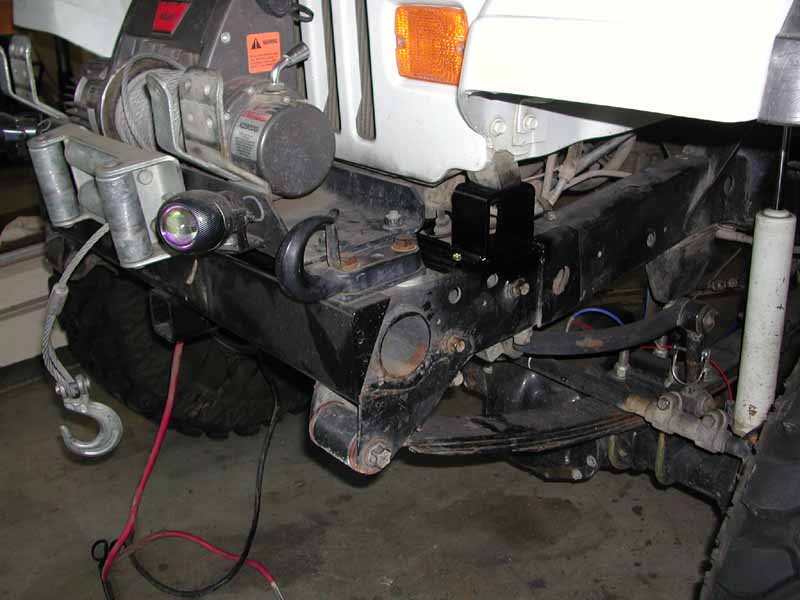
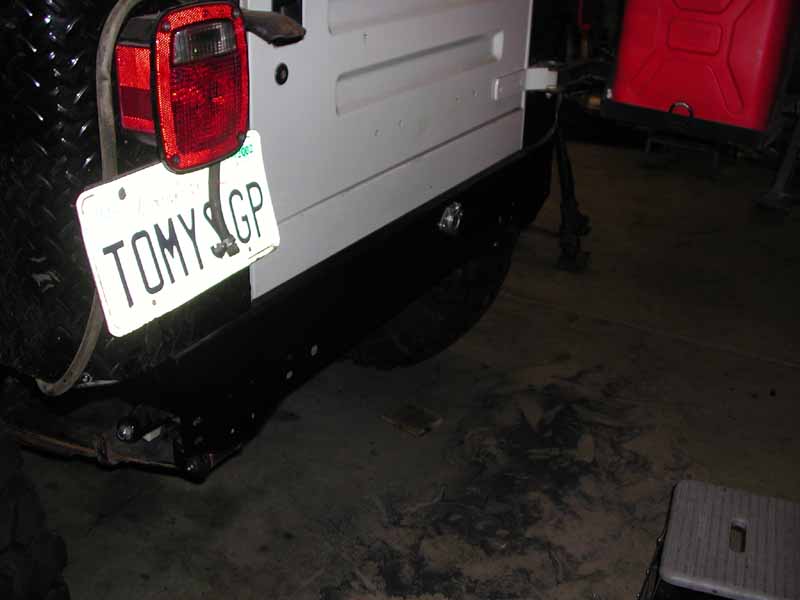
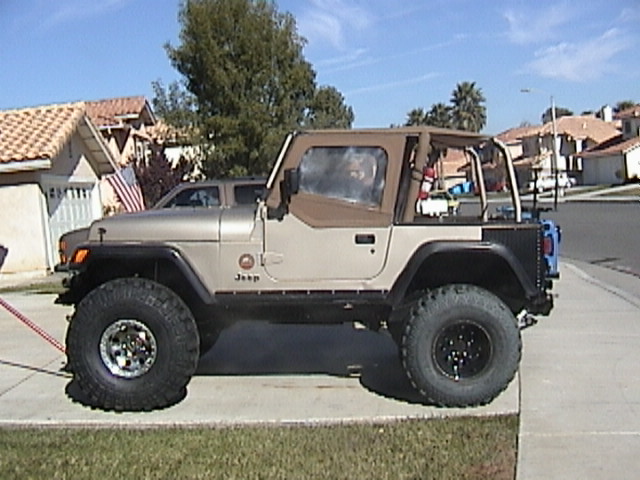
This morning I went to Ace hardware and picked up bolts for the skid plate. I had some temporary bolts in there to hold things in place. The new bolts are 3"x0.625" fine thread. It was a bit of a challenge to line up the holes to install the larger bolts, but once it's all done it's going to be very strong. Next I installed the fuel tank fill hoses. These are real crappy hoses and are very rigid. They aren't the original ones. I changed them at some point in the past when I did a body lift. After they were installed I tried to pour about 4 gallons in the tank. About 3 gallons made it and the rest was on the garage floor. I'll have to replace the fill hoses very soon. Natalie helped me bleed the brakes, then I was all set to put it on the trailer. I rolled out into the street and started the sucker up. Man is it loud with nothing but a header. I drove it up on the trailer and headed over to the muffler shop. The guy there said his guy who does good custom work was off for the weekend and I should come back Monday. I drove back home and put the Jeep in the driveway. Quinn and I got the rear bumper installed and then I continued work on the air compressor mount. I ended up finishing the mount, installing the York and estimated what belt I needed. Next I connected the Rancho 9000 shock control hoses and started work on the air tank. I had to re-route the main airline a bit to reach the air tank. Then I removed all the old trailer brake hoses and solenoids. I'm going to relocate these into the trailer for faster brake response and release. I then wired the 6-wire electrical trailer plug on the back of the Jeep. I ran the extra two wires from the receptacle to the dash in anticipation of re-wiring the trailer brakes.
11/24/2001 - Gas tank hoses, Air system/brakes
This morning I went to the dealer and picked up new gas tank fill
hoses. My old ones are stiff, brittle and shaped wrong. After
installing the hoses I discovered that I lost my gas cap on the Jeep when I ran
to the muffler shop on Friday. Guess I'll have to pick one up. Next
I worked on the trailer brakes. I plumbed and wired the solenoid in the
trailer to activate the brakes. Next I swapped out the pressure switch for
an adjustable one that can go to 125#. I installed a regulator for the ARB
solenoids and set it to 75#. I re-wired the trailer brake relay and switch
so that the relay doesn't activate unless the brake switch is set to the
"Brake" position. Use to be that no matter what the switch
position, when I stepped on the brake pedal you could hear the relay
click. Now it only clicks when the switch is on. There's another
switch position "Park" that activates the trailer brakes without
having to press the brake pedal. Eventually I think I'll use the extra
wire in the receptacle to have a "Park" wire. That way I can
have a regulator on the trailer and have a "less than 125#" brake system.
I think 125# is going to be a bit much, but too much is better than not enough.
11/25/2001 - Cleaning day
I started the day by washing the Tahoe. I knew I'd be too tired later on
and figured I better do it first. After it was clean I moved on the the
Jeep. I removed the "Back-Rack", center council, storage boxes
and all the carpet. I tried washing the carpet in the clothes wash
machine, but it didn't seem to do any good. I hosed them instead. I
then washed the Jeep inside and out and installed the hard top and full
doors. I then washed the motorcycle since it's been sitting outside all
week.
11/26/2001 - Phone calls
Called the muffler shop and ordered the center-in side-out FlowMaster
muffler. Made appointment for Wednesday for the exhaust work.
Talked to the driveline shop in town and had them order the carrier bearing
parts I need.
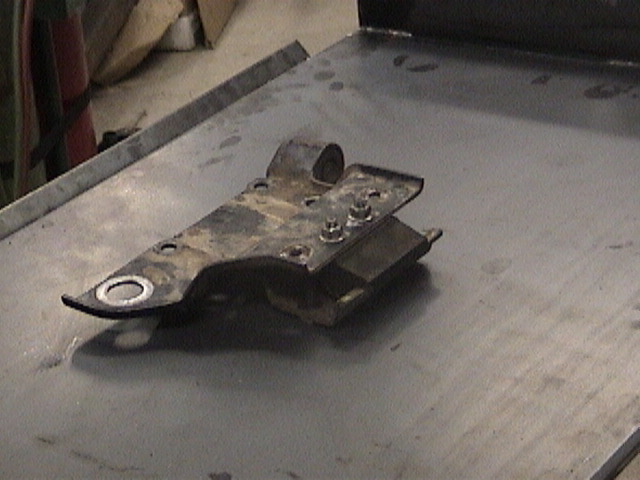
11/27/2001 - Made the carrier bearing mount
Picked up the carrier bearing parts. Made the carrier mount that attaches
to the skid plate. I didn't install the carrier mount because I want to
wait until the exhaust work is done and I have the drive shafts. This way
I can be sure that the drive shaft clears the exhaust flange mount.
11/28/2001 - Exhaust work done
Put the Jeep on the trailer and took it to the driveline shop. Showed him
what's going on. Dropped the Jeep off at the muffler shop for the exhaust
work. Stopped by the driveline shop at lunch and he won't have the shafts
ready until tomorrow. Drove over to the muffler shop and he had the down
pipe hanging too low. I asked him to re-route in front of the oil pan sump
for
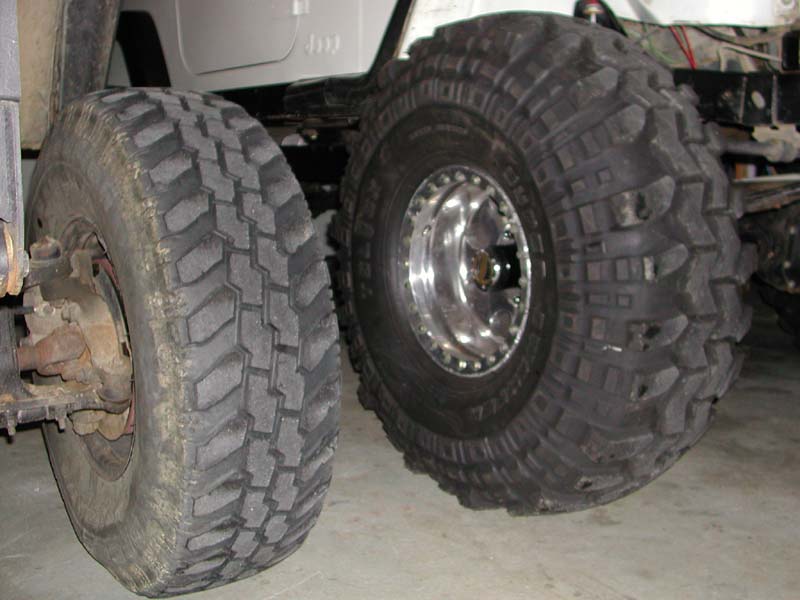
better clearance. Ordered 38.5x14.5x15 Super Swamper TSL/SX tires from
Pavement Optional.
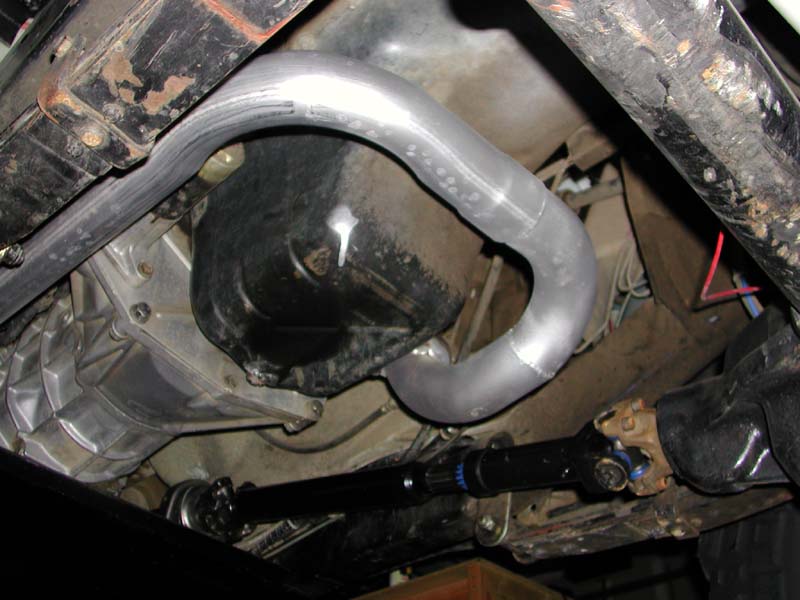
Later in the day I picked up the Jeep from the muffler shop and the down pipe running in front of the oil pan sump is great. Much better clearance. Now I need to think about a skid plate or some sort of protection for the bell housing and oil pan.
This evening I built a tool to fix the drivers side door. Years ago, I damaged the side of the Jeep slightly in a gas station. I was backing up and the drivers door was open. It caught a fire extinguisher hanging on a wall and opened the door WAY open. This pushed the lower hinge in just slightly. From the outside you could barely tell that the hinge wasn't lined up correctly, but when I installed full metal doors, the upper corner didn't seal against the hard top completely. This caused a whistle when I would drive faster than 30MPH or so. I would open the wing window to get the whistle to stop. Well, the tool I built was a "U" shape metal thing that I could use to apply pressure to the inside of the hinge and pull it back out where it belongs. I parked the Jeep in the garage and used the beam holding the second floor of the house up to pull against. I used chains and the high-lift to pull with my "U" shape tool thing. I pulled it out a bit and took the Jeep for a drive. No whistle!
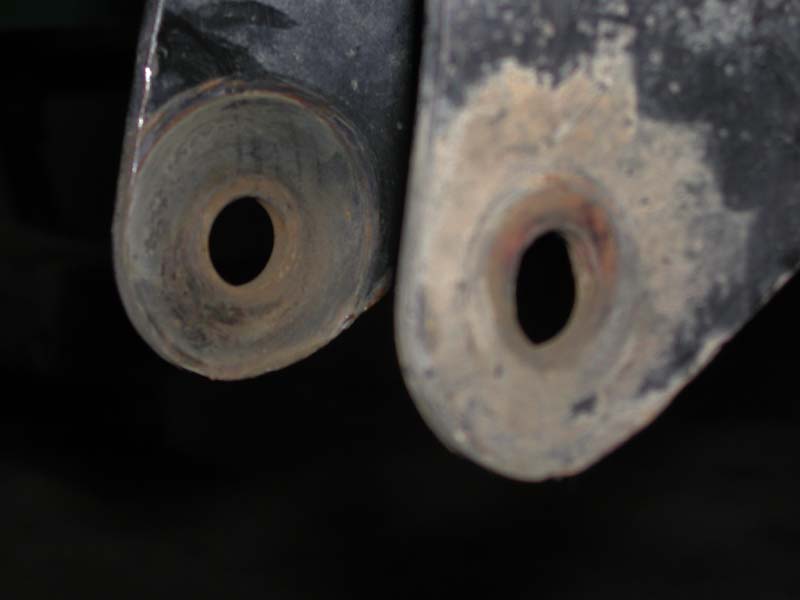
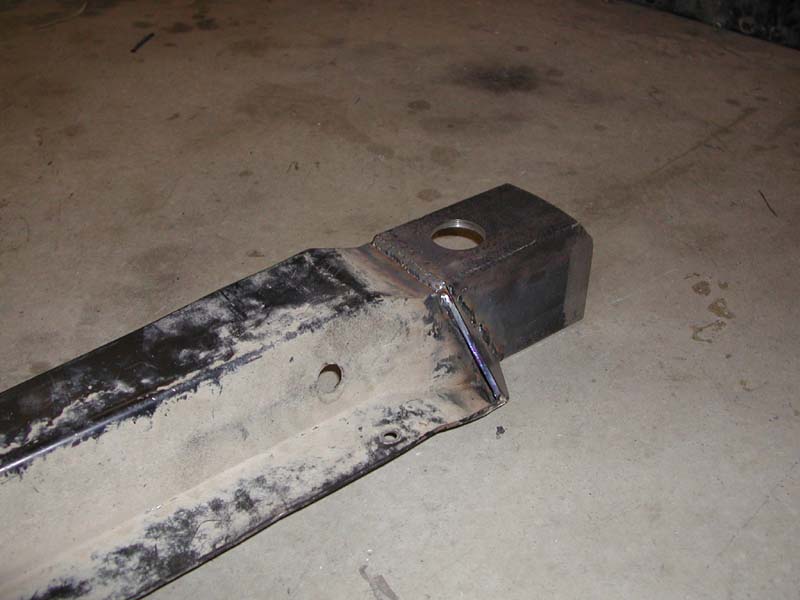
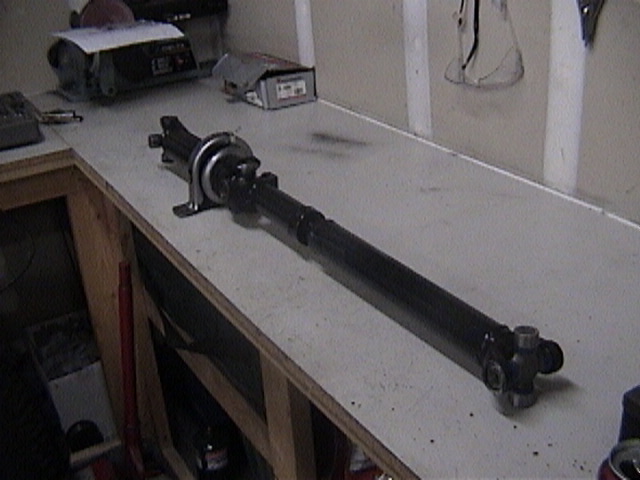
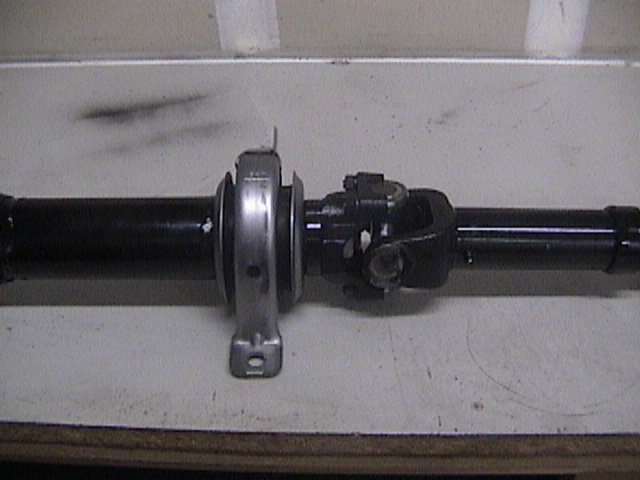
11/29/2001 - Front drive shaft, new tires
I picked up my front drive shaft at lunch today. Pic1,
Pic2 & Pic3 It
came out much more
expensive then I anticipated, but the shop worked with me and gave me a 20%
discount on the parts. The more I think about it the more it makes
sense. It's actually 2 drive-shafts with a bearing support, so I guess
it's reasonable that it's about twice the normal cost. Still, ouch!
I got a call from Rig at Pavement Optional. My tires are in. Going to pick them up tonight.
I picked up the tires and Eric and I test fitted one of them to see how it's going to look / fit. We installed it on the front left to check the steering. We drove up to Troy's house to put the Jeep on the ramp and I discovered I'm going to have to move my inner fender wall a little, and trim the fender edge again. No big deal since I cut the spot welds last time and it's bolted together now. I just have to un-bolt it, shorten the support rods behind it, drill a hole, bolt it back together relocated and trim the fender edge. Now might be the time to switch to TJ fender flares since mine aren't going to take to the new shape very well.
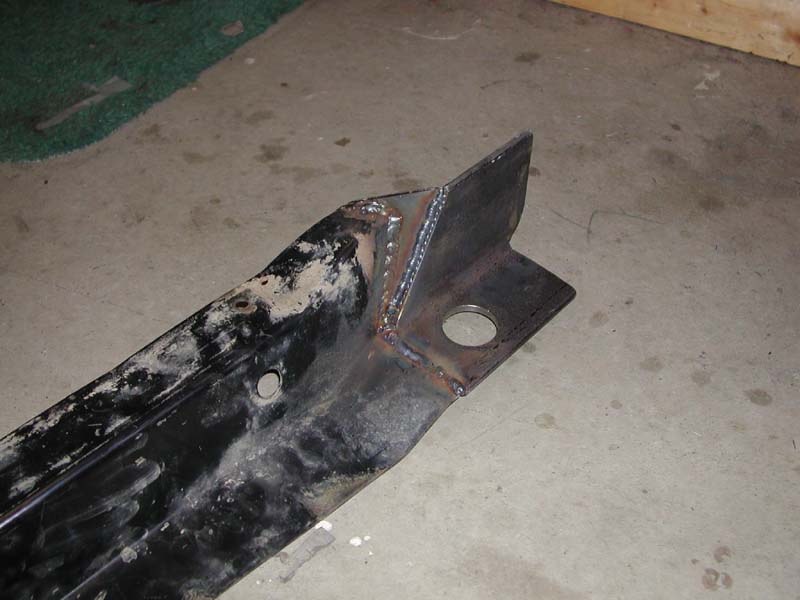
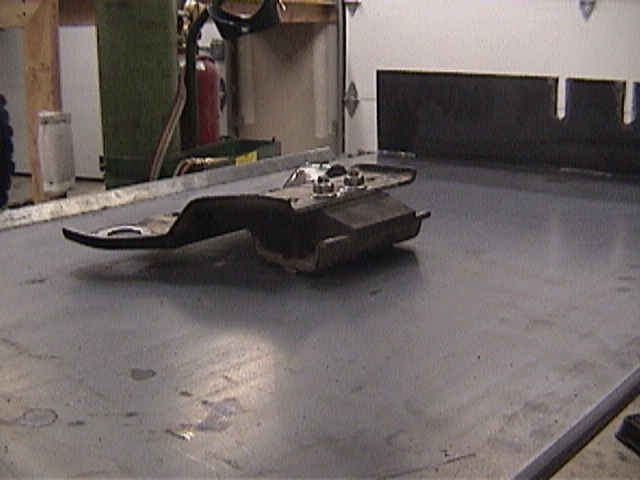
After we finished measuring and testing the one tire, I went to work on installing the front drive shaft. I placed it in there and immediately noticed that I have a ton of compression room on the slip joint. Too much I think. The slip joint isn't nearly as long as I wanted. I have about 2.5" of compression and 2.5" of extension. This works with my current front suspension setup, but I plan to install Revolvers and extend the front shocks. I'm going to gain a lot of droop and I think the shaft will dislocate. I've also heard some horror stories about Revolvers on a Reverse shackle SOA setup. Perhaps I'll extend the shocks and call it a day? Anyway, I welded the carrier bearing mount to the top of the skid plate with a bit of a side angle. What I mean is, the carrier bearing is not directly between the x-fer case yoke and axle yoke. It's a little off to the side to help clear the exhaust down pipe and flange mount. I'll be going back to Troy's to check compression to see if the drive shaft clears the exhaust.
Next I aired down all the tires and removed all the bead lock rings. Tomorrow I'll take them to Pavement Optional and have them break down the inside bead so I can install the new tires. I also used some aluminum wheel polish to try to recover some of that original shiny look.
11/30/2001 - Tires, Front drive shaft
At lunch today I dropped the tires off at Pavement Optional. He's going to
break down the inside bead and take the rubber off the wheel. I'll mount
up my new tires at home and bolt the bead lock rings back on. All except
one, since they didn't order 5 tires like I asked. The fifth tire will be
here any day.
In the evening I picked up the tires & wheels. I went home and mounted the new tires on the beadlocks and installed them on the Jeep. Then Eric and I took the Jeep over to Troy's house to see how they do on the RTI ramp. I have some fender adjustments to make. The rear tire hits the forward part of the fender well on compression. Also, the front fenders need a little more clearance at the rear part of the fender well too.
I went to work on installing the front drive shaft. I created a compound u-joint angle by moving the carrier bearing closer to the inside of the frame on the skid plate. I did this to make sure that the drive shaft and exhaust down pipe don't come in contact. I welded down the carrier bearing mount.
12/01/2001 - Tire balancing, fender flares
This morning I took the Jeep to America's Tire to have the wheels
balanced. I wanted to have this done at Pavement Optional since he has the
equipment, but I need to drive over to Orange County tomorrow and Pavement
Optional can't balance them today. Naturally, the tires ride much smoother
now. Next, I went to work on moving the rear axle back a little to help
with the clearance with the fender well forward of the tire. I re-drilled
the main and second leafs on each side 0.75" back. I don't think the
axle will contact the gas tank, but if it does it will create it's own clearance
easy enough.
Here's a couple shots of the tires installed on Eric's Jeep. He's thinking about getting these tires too and wanted to see how they fit. Very nicely I say! Pic1 & Pic2
After we put the wheels back on my Jeep we went back over to Troy's to test my rear axle move. Clearance looks really good forward of the tire, now I just have to trim behind the tire. Troy gave me his original Sahara fender flares from his TJ. They're painted "Hunter green" so I'll have to work on getting the paint stripped.
12/02/2001 - Lights
This morning I went to work washing the Jeep to show the guys at Darrin's house
later today. After that I went to work on the fog lights. I had one light
out on the front lights, and both reverse lights didn't work. Side lights
were OK. The front turned out to be a broken filament. I had another
bulb on the shelf so I changed it out. Inside the light, there was an
eyelid type device to make the light have a nice, clean cut, straight
edge. I guess it was too keep the lights out of on-coming traffic's
eyes. Well, I don't need that since the Jeep rarely runs on the street and
I don't use those lights with on-coming traffic. I removed the eyelids out
of both front lights. The problem with the reverse lights turned out to be
the wire to the relay under the dash. I noticed a wire hanging down a
couple weeks ago but wasn't sure what it was. I traced it to make sure it
was the same wire and it was. After hooking it up to the relay the lights
worked fine. I then took apart the rear lights to remove those eyelids as
well.
12/03/2001 - Front drive shaft, fender flares
I talked to the drive line shop today. They're going to try to find a
longer slip joint and change mine out. Later, I started sanding the green
paint off the fender flares. It sands pretty easy with a 5" orbital
sander and 100 grit sandpaper.
12/04/2001 - Fender flares
I got all the fender flares sanded down and painted. The paint looks
rather crappy so I might have to sand them down again and try with a different
paint. For now, it'll work fine for getting the fenders trimmed and
installing the flares. I trimmed the metal on the rear right wheel well
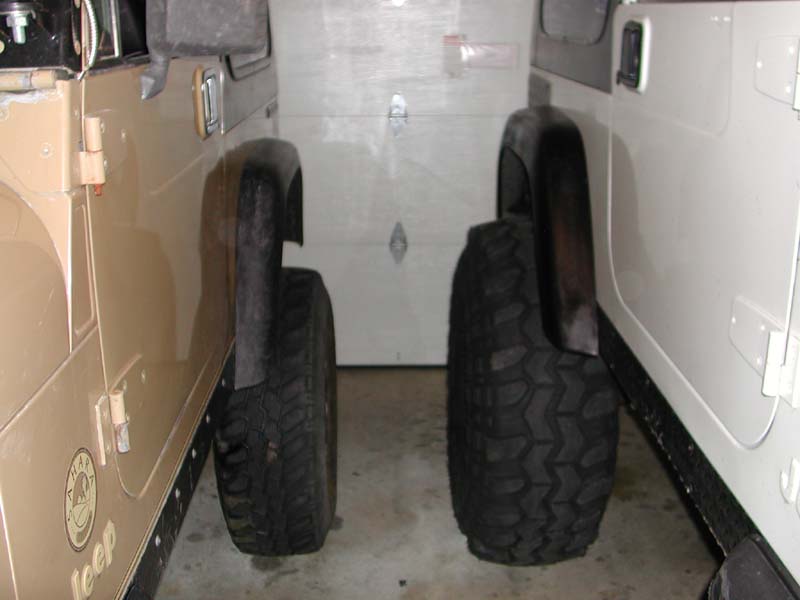
and got that flare installed. I'm borrowing Eric's Sawzall the cut the
rest of the fenders. In this picture, on the
left is a standard TJ flare, and on the right is my "Sahara" TJ
flare. You can see it's a little bigger.
12/05/2001 - Front drive shaft, Camera returned
I spoke to someone at Tom Wood's Drivelines this morning about the slip
joint. Turns out they don't use an off-the-shelf slip joint, they make it
themselves. I talked to Ace at Specialized and he said he would contact
Tom Woods and see if he can get the slip.
I got my Nikon camera back from the repair center.
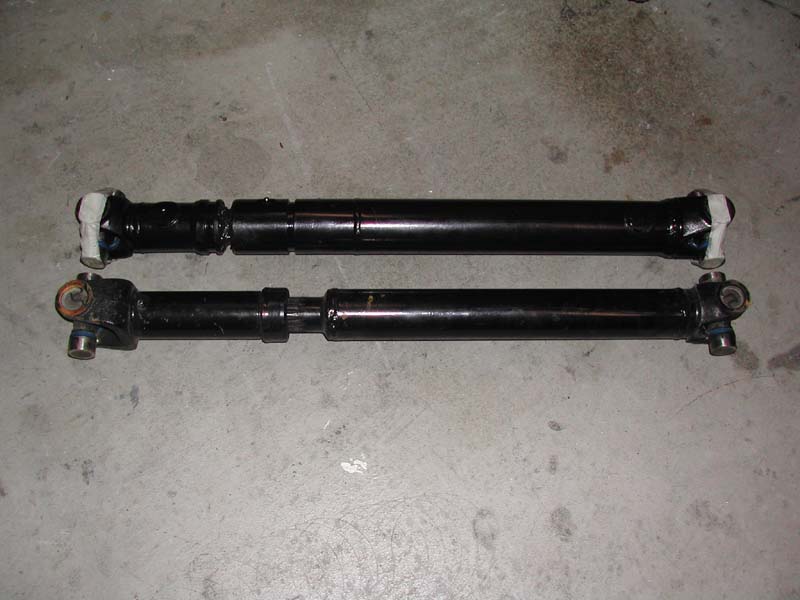
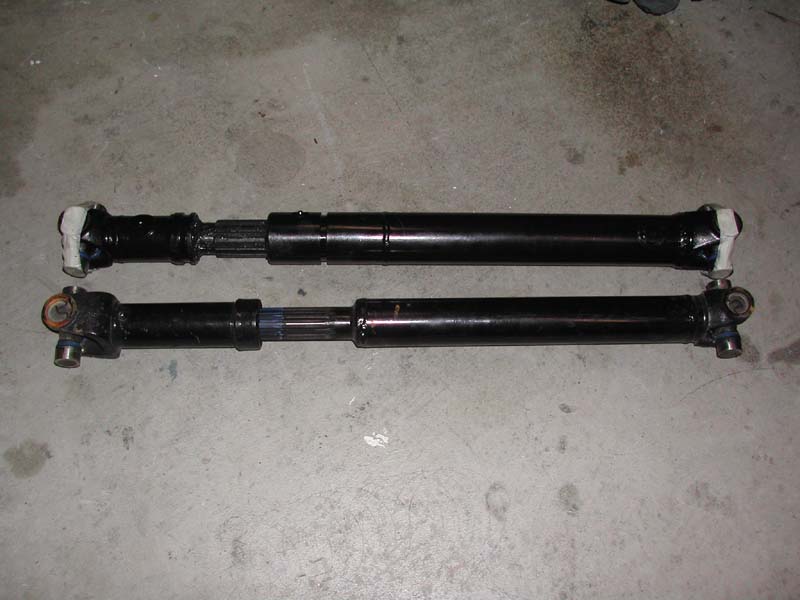
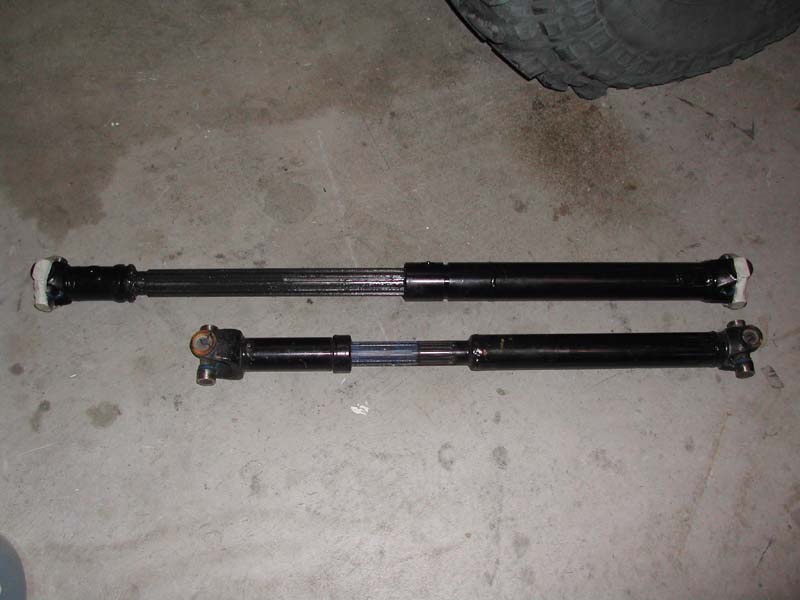
01/28/2002 - Finally got the right front drive shaft
Here's some pictures of my new front drive shaft. I have been waiting for
this drive shaft patiently since November and it finally paid off.
The original drive shaft is 12.5# and the new one is
21#. That's pretty heavy, but not as heavy as I was expecting.
Here's a few pictures:
Both collapsed - New one on top
Both at running length - New one on top
Both fully extended - New one on top